
Snow Day Art Project
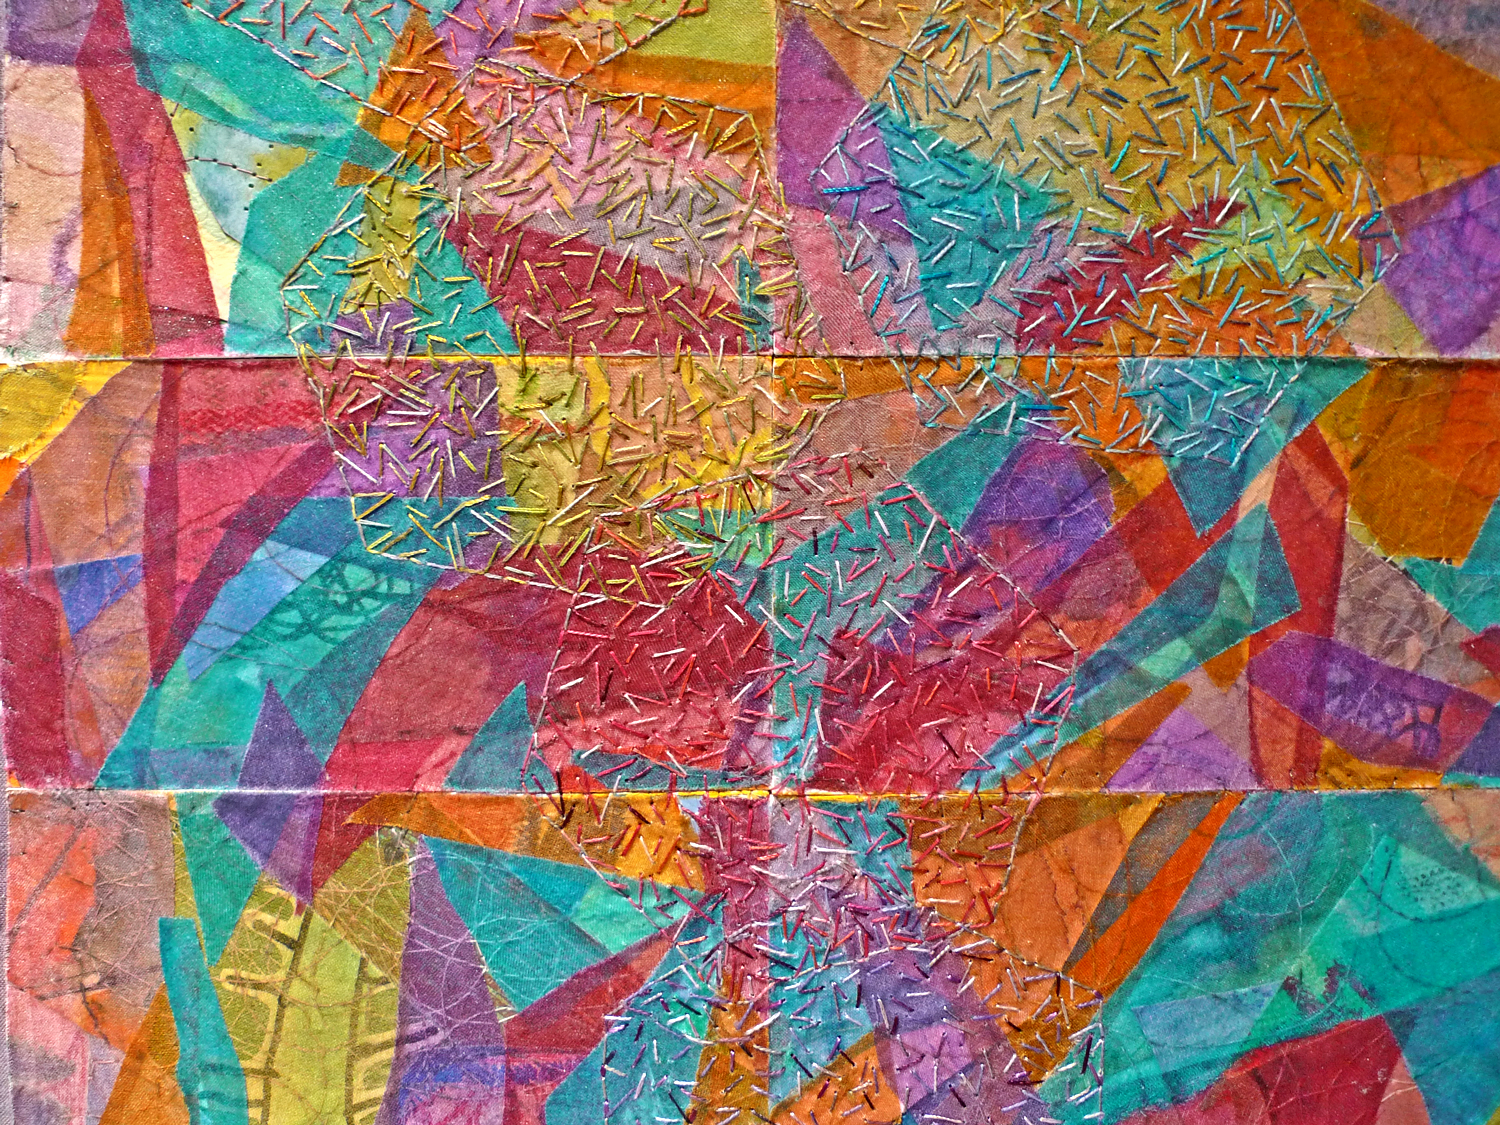
During a snowstorm in 2015, I had the honor of collaborating with my 7 year old, Mazzy, on a project utilizing her preschool and kindergarten drawings and paintings. We had a towering stack of drawings and paintings that she had completed in preschool and Kindergarten. Due to the use of lower quality papers and temper paints, many of the pieces were deteriorating over time. She selected her favorite pieces to keep. The other pieces we photographed and then used in a collaboration called Mazzy's Sketches.
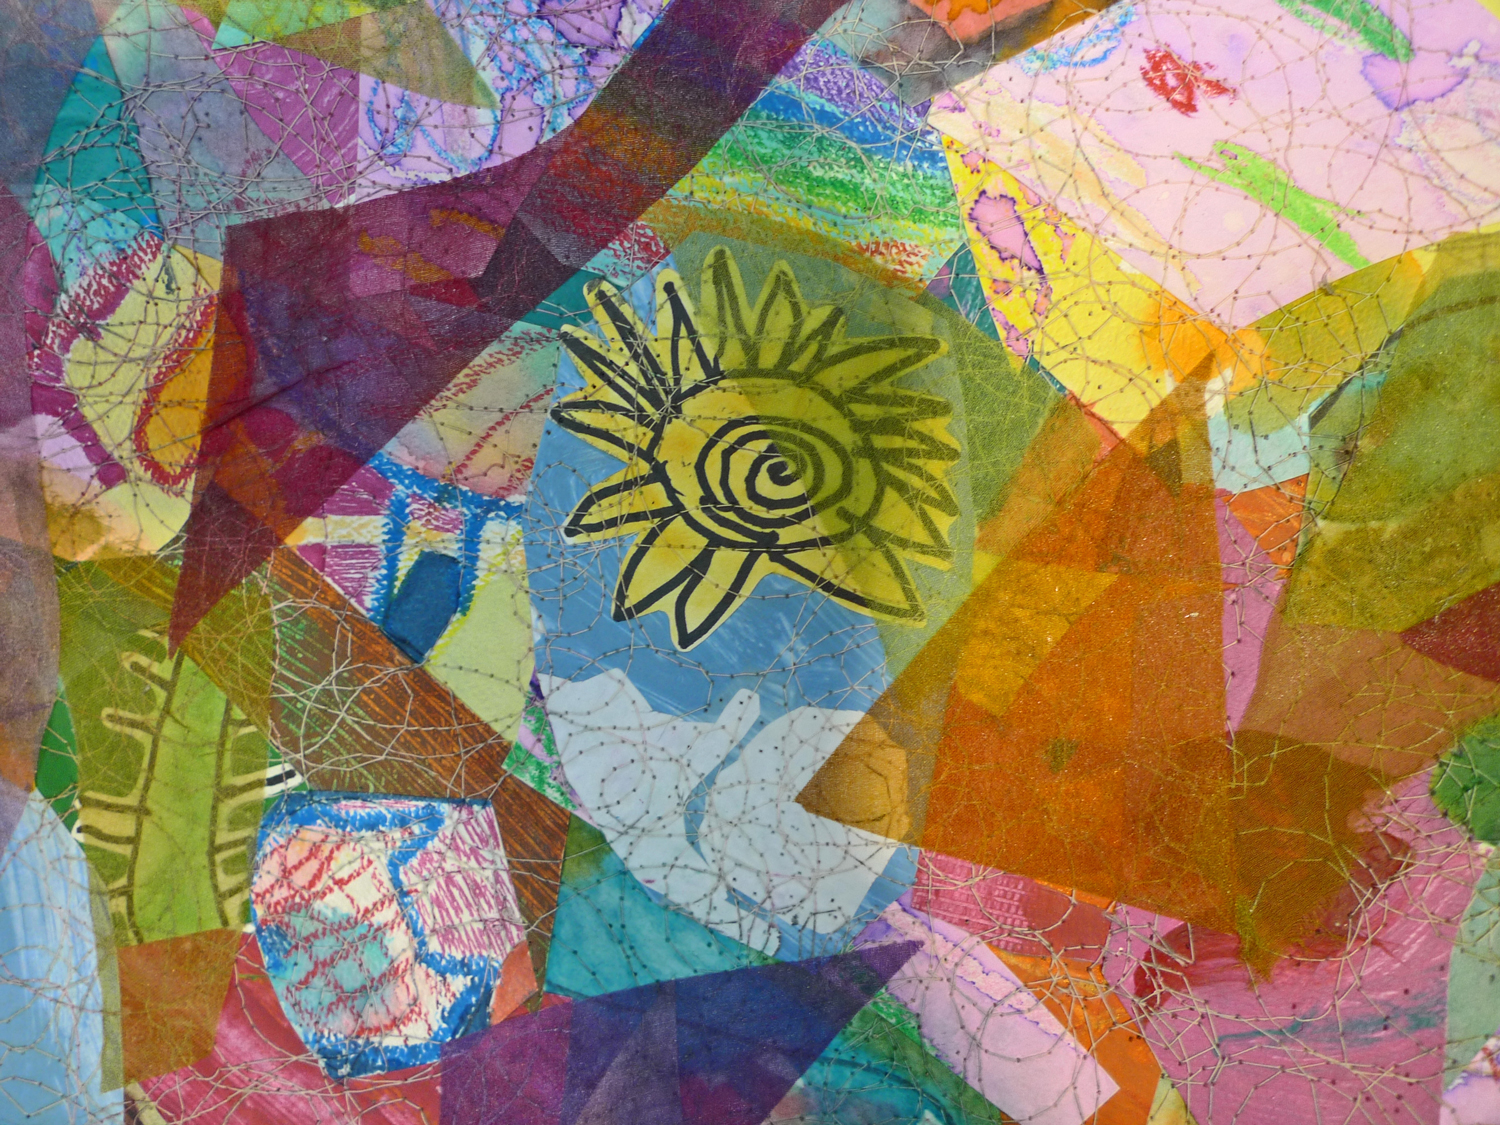
Mazzy cut her drawings and paintings into various geometric shapes. She then collaged them on to heavy watercolor paper using PVA glue. To preserve the paint and papers, I coated the collage with Matte Gel Medium. Once dry, I heat adhered silk organza I had previously dyed with fiber reactive dyes to Pellon 805 Wonderunder. Mazzy then cut geometric shapes from the Pellon backed silk organza and I helped her adhere them to the collage with a heated iron.
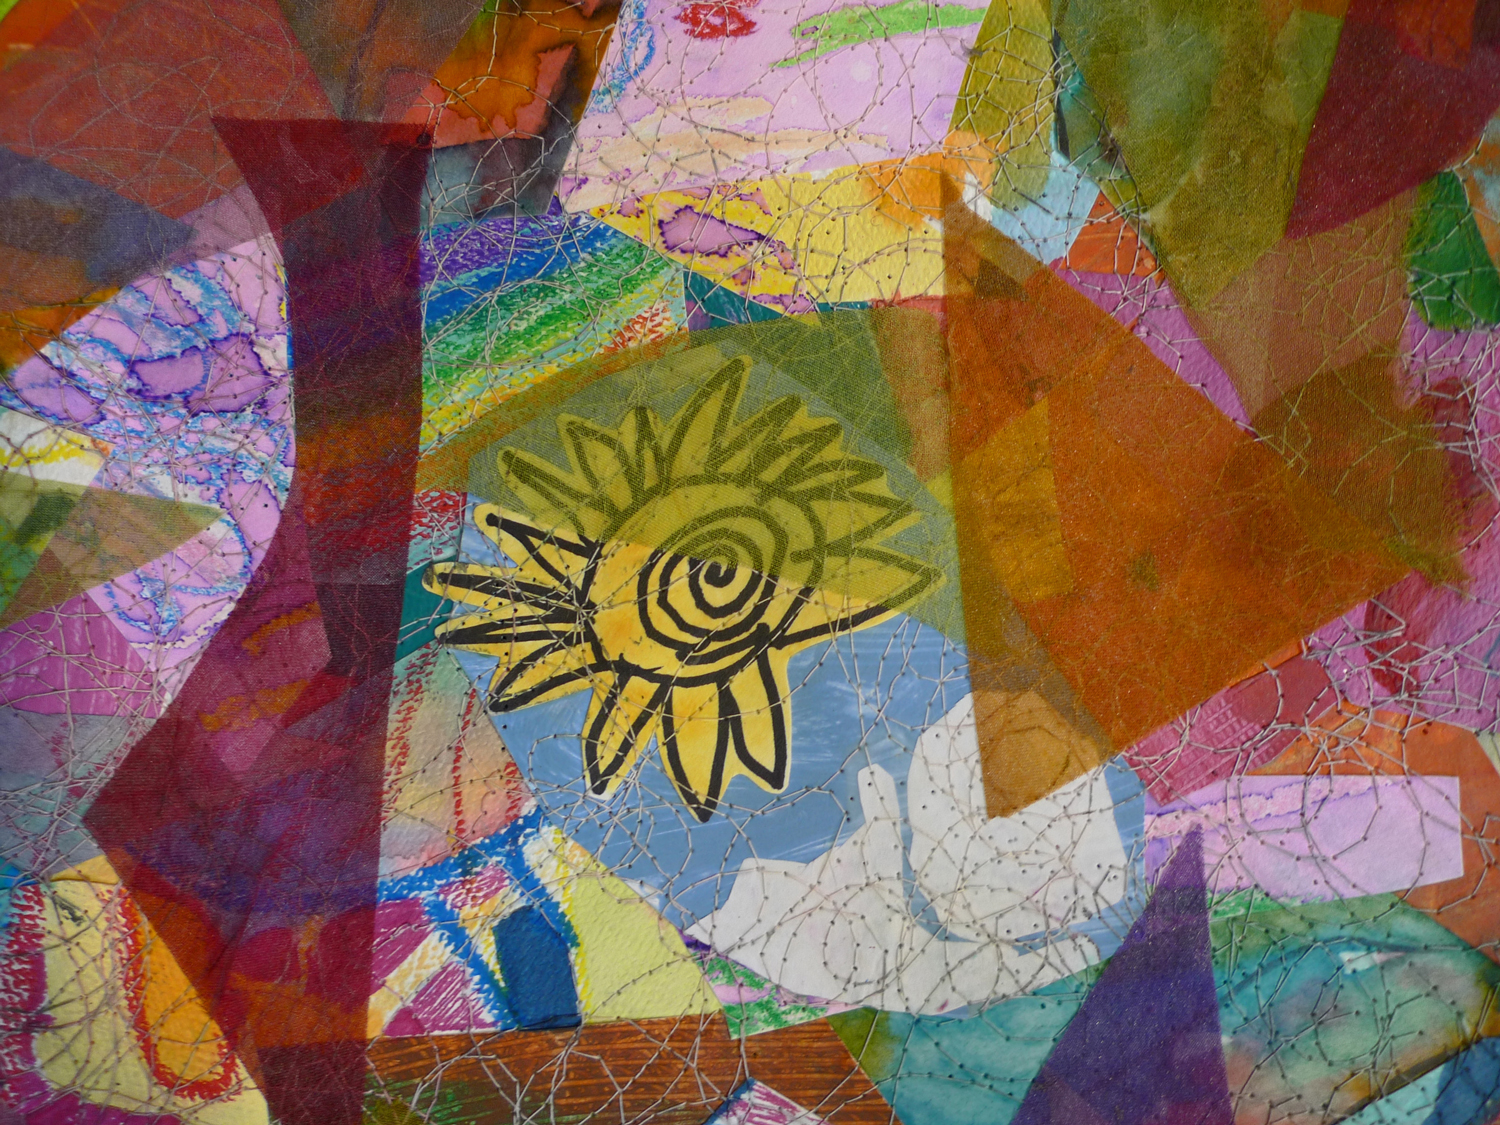
Gluing a layer of mid-weight cotton fabric to the back of the collaged watercolor paper added a more secure foundation to stitch through. Once the PVA glue dried, I then used a rotary cutter to slice the collage in to rectangles. We then arranged the rectangles in a pattern that we both liked. To add additional texture and further secure the layers together, we took turns using free motion machine stitching. The free motion stitching also connected the rectangles to each other in a panel.
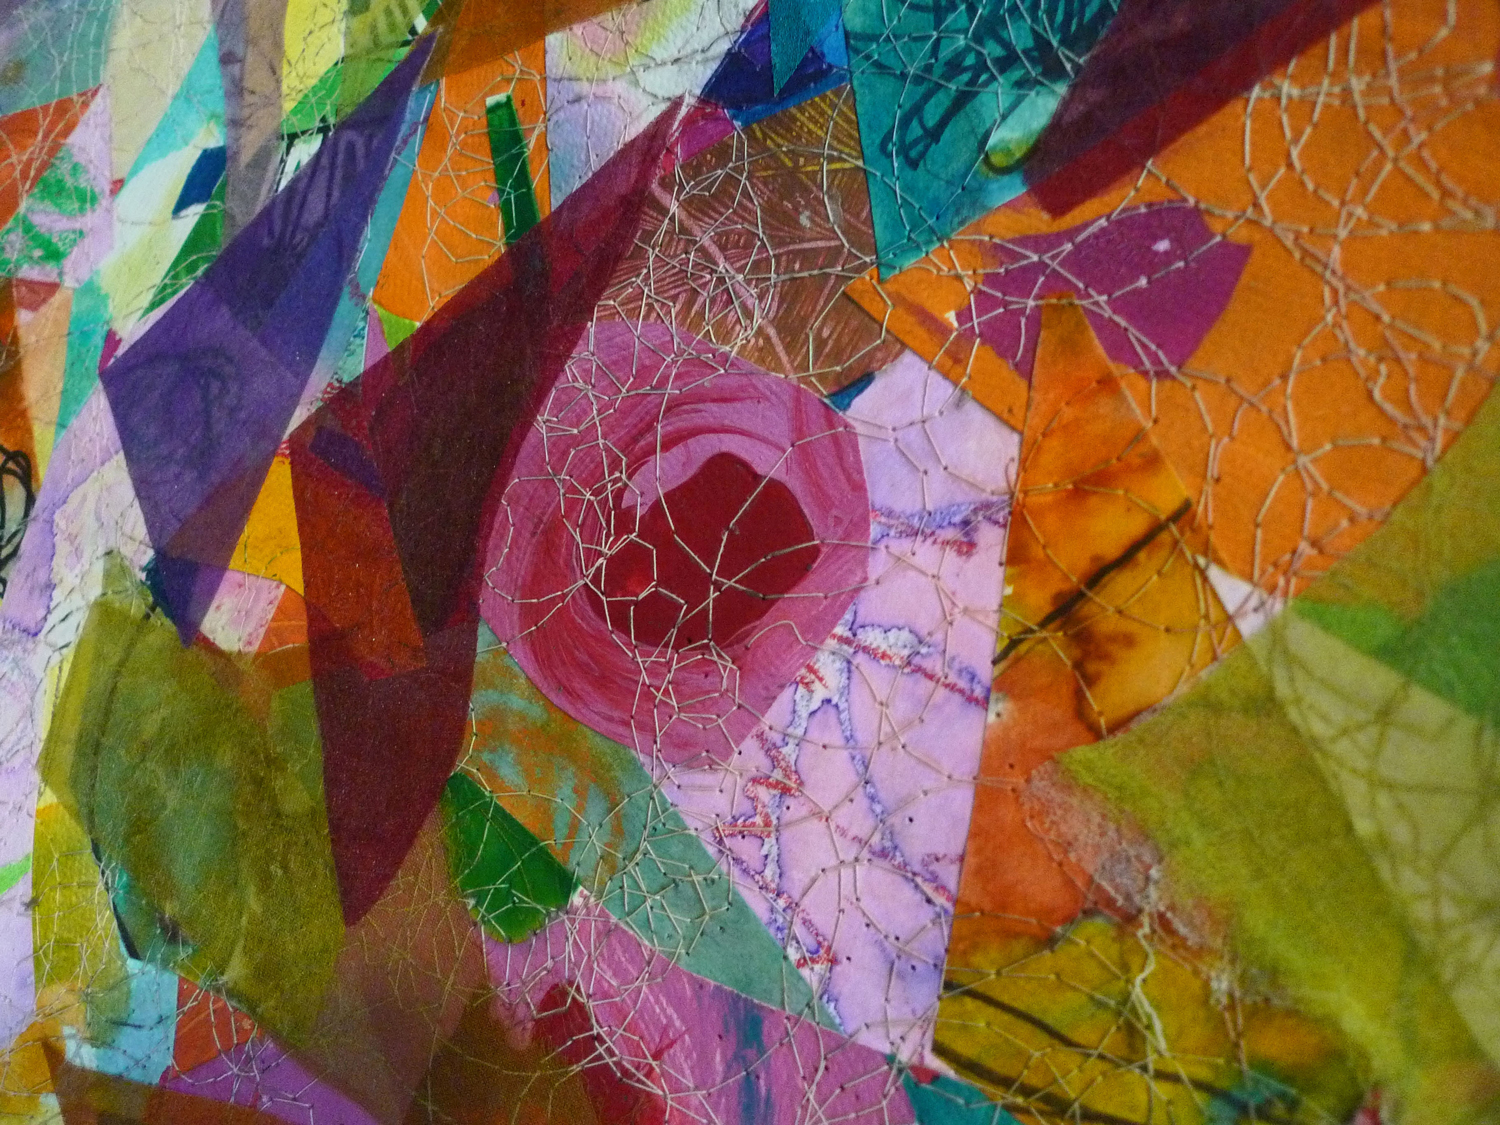
I then hand stitched hexagons in a flowing pattern across the panel using a rainbow of embroidery threads.


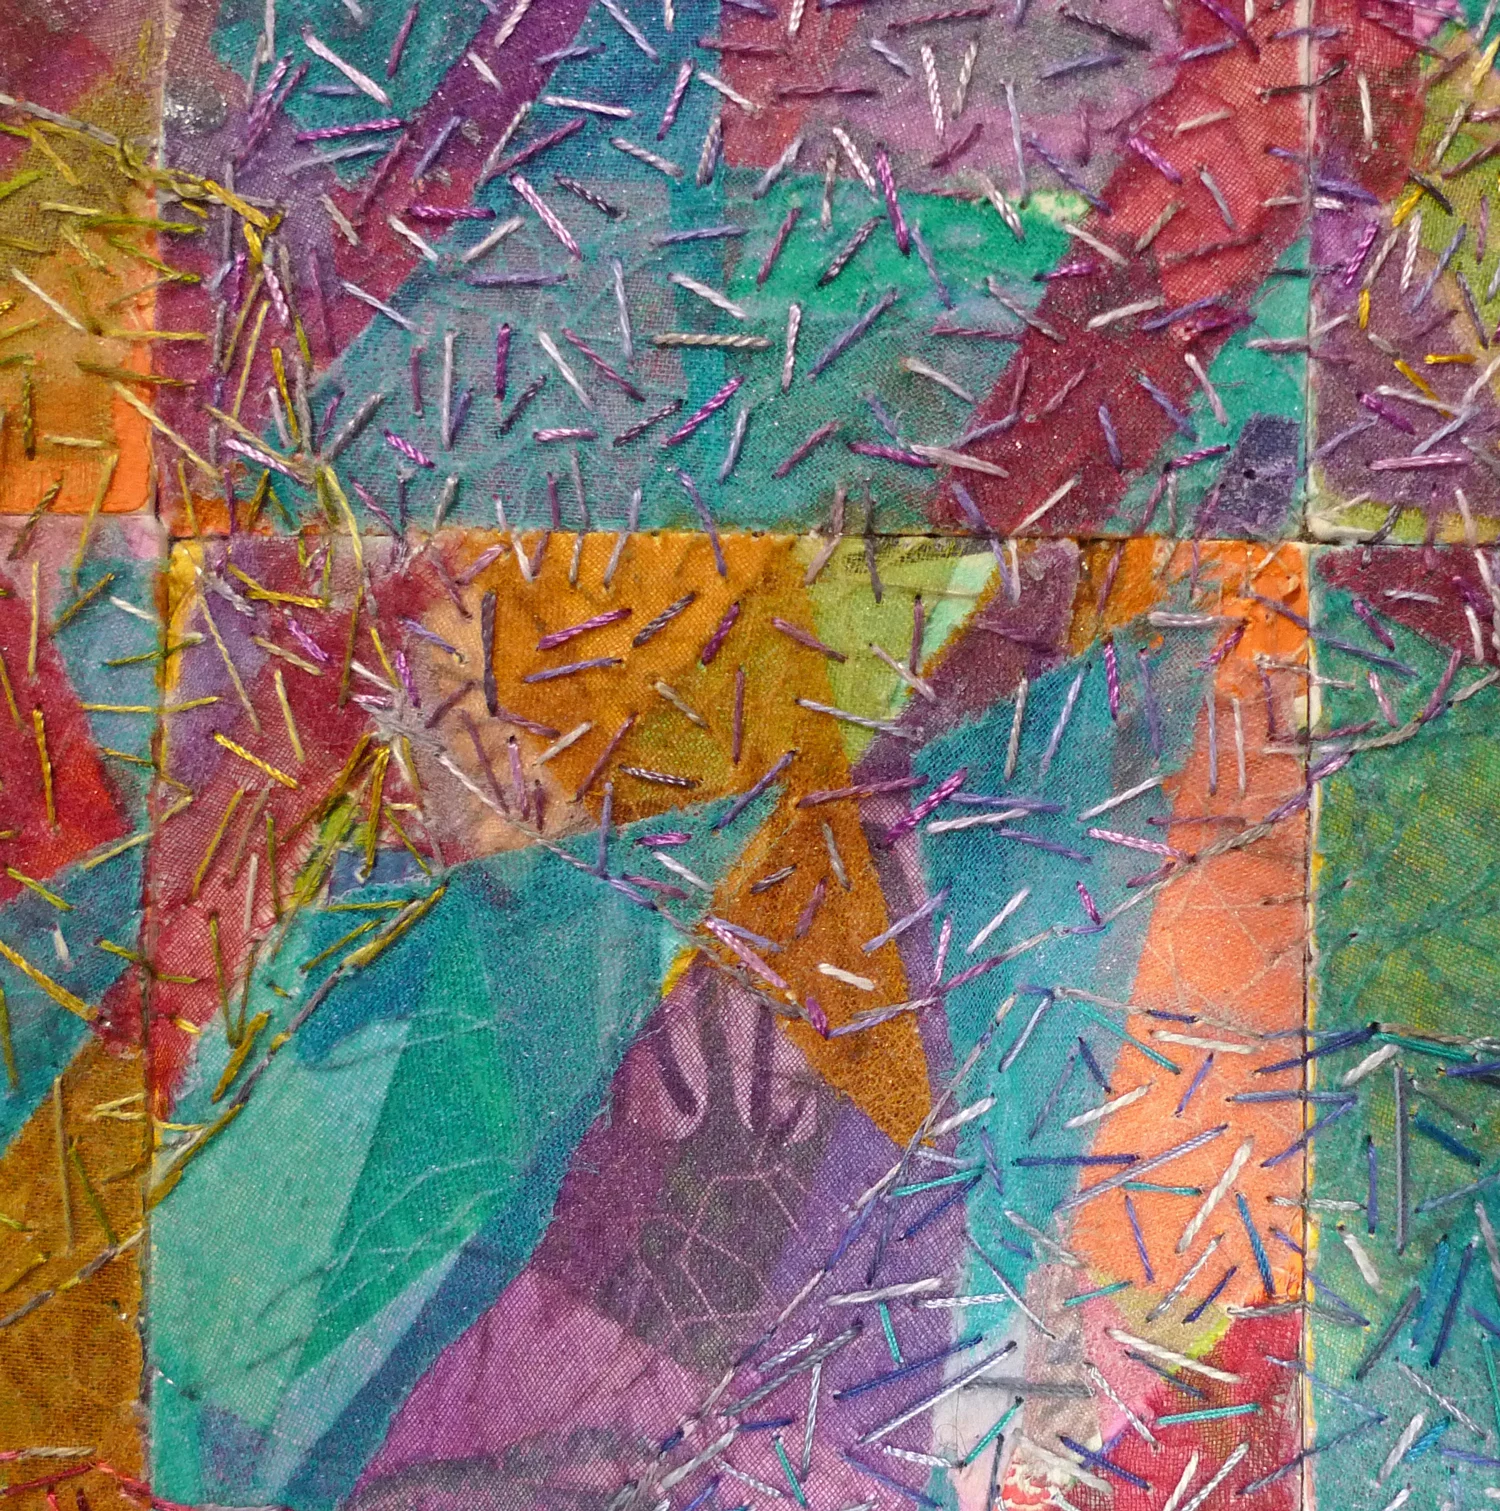

I hand dyed a background fabric using fiber reactive dyes. I hemmed the fabric edges and added a rod pocket for display. Finally, I adhered the panel to the background fabric using smoky invisible thread and a stitch in the ditch quilting concept to hide the method of attachment. Due to the overall size of the project I have been unable to get a clear picture of the complete project. Therefore, all of my photos are currently of the panel before attaching to the background fabric. I will experiment further in methods of photographing large pieces clearly.
Collaborating with my daughter was both a fun and frustrating experience due to her young age. I am happy that we were able to create this piece together. Mazzy was thrilled when I displayed this piece in a show of my work. Perhaps at the end of elementary school we will come up with another project for her first through fifth grade drawings.
Making a Child's Dress Form
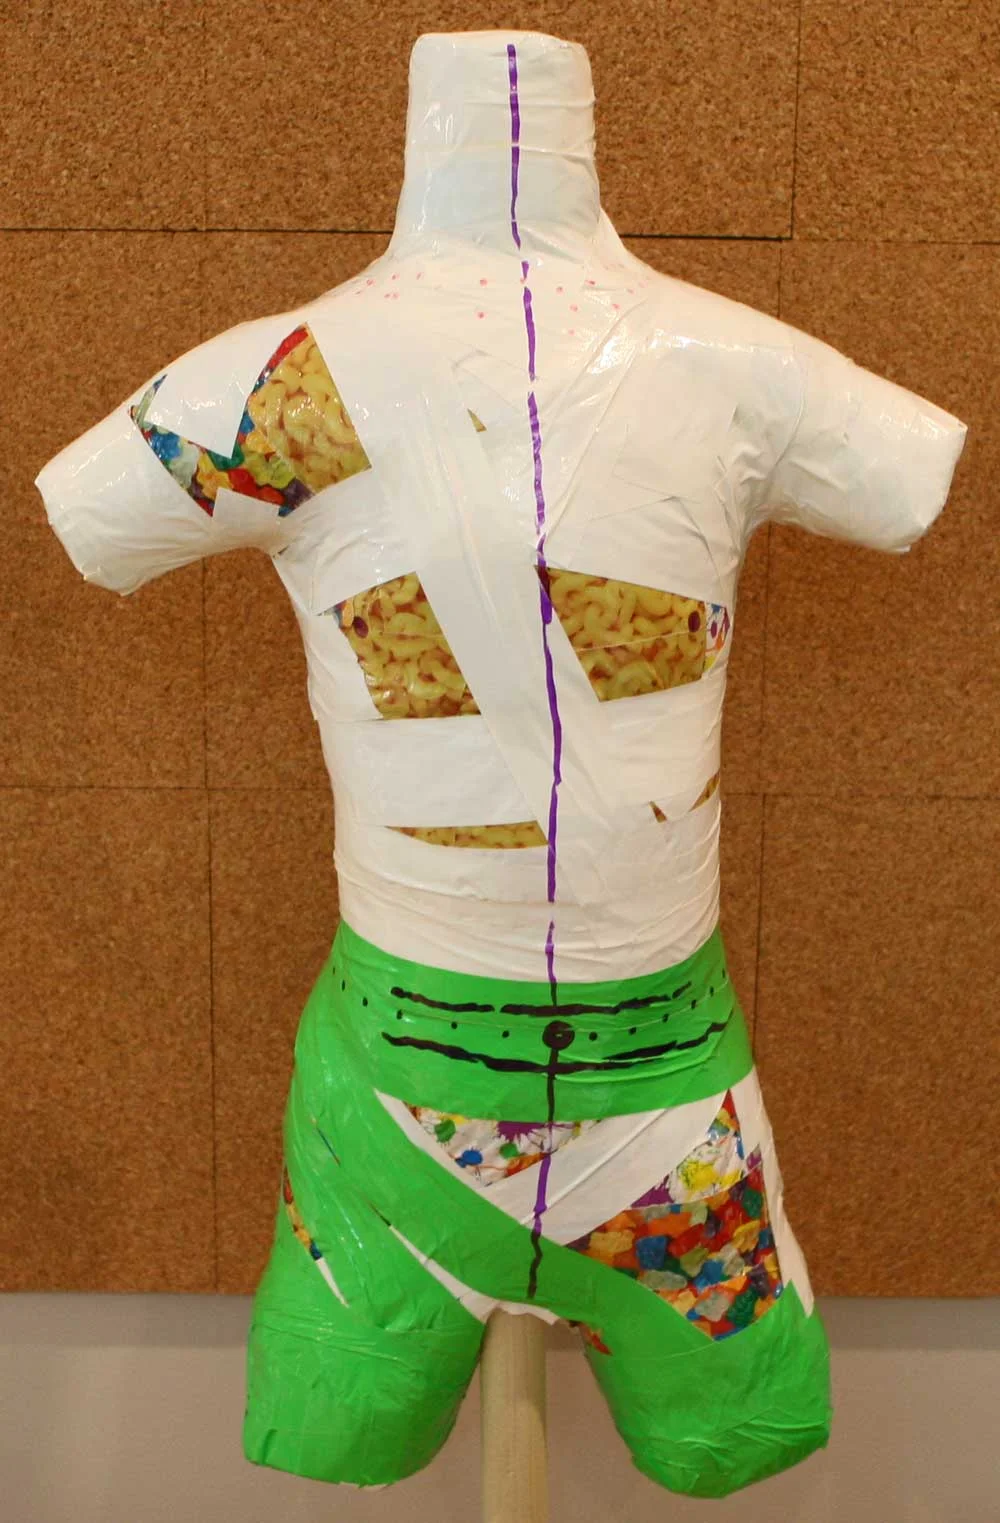
My 7 year old hates for me to keep trying clothes on her when I am making her something new. So, I decided to try making a duct tape dress form of her. Making the dress form is a easy concept for an adult model. However, for even a well behaved 7 year old I would say Don't Try this at Home. Well, at least make sure you have a nice bottle of wine for you and ice cream for the kid to look forward to when it is over. It only took an hour to get the shell done but that is still a long time to get a kid to stand still without wiggling while you are mummifying them in duct tape. Also, the smell of the massive amount of duct tape is a bit overwhelming for an adult and more so for a kid.
My 7 year old hates for me to keep trying clothes on her when I am making her something new. So, I decided to try making a duct tape dress form of her. Making the dress form is a easy concept for an adult model. However, for even a well behaved 7 year old I would say Don't Try this at Home. Well, at least make sure you have a nice bottle of wine for you and ice cream for the kid to look forward to when it is over. It only took an hour to get the shell done but that is still a long time to get a kid to stand still without wiggling while you are mummifying them in duct tape. Also, the smell of the massive amount of duct tape is a bit overwhelming for an adult and more so for a kid.
Otherwise, it was an easy concept. It took me more duct tape than I expected for a kid size form. I used almost 5 rolls total but the decorative tapes were smaller rolls. I also used two bags of 20 oz Polyfill. I repurposed a wooden wire spool for the base and used a large wooden dowel for the post.
I read all the various how to's online and then decided to make mine a little different. With a child the top of the arm fit and the top of the leg fit are very important for comfort. So, I did not feel the simple torso to hips form was enough. I had her put on an outgrown long sleeve top and long pants so they fit snuggly. Then, I wrapped her in duct tape. Most people seem to cut down the back but with the leg and arm I decided to cut down one side. With a side seam, she was then able to slip out of the other side while it remained intact. I started from the top taping the the form back together and then stuffed from the bottom. I stuffed plastic bags in the open end of the arms and legs and then taped over them with duct tape. I stuffed the form with two bags of polyfoam so it is very stiff. I then inserted the wooden dowel and taped the form closed at the bottom. The dowel then slips into the wooden wire spool so the form stands up straight and does not tip over. Afterwards, I double checked the form to her measurements. Make sure to mark bellybutton, nipples, and center of front and back with a Sharpie. Children's dress forms appear to usually be more expensive than adult forms so I am glad to have this done until she changes sizes. I may be able to pad and tape this form as needed as she grows. I will keep you posted.