
Snow Day Art Project
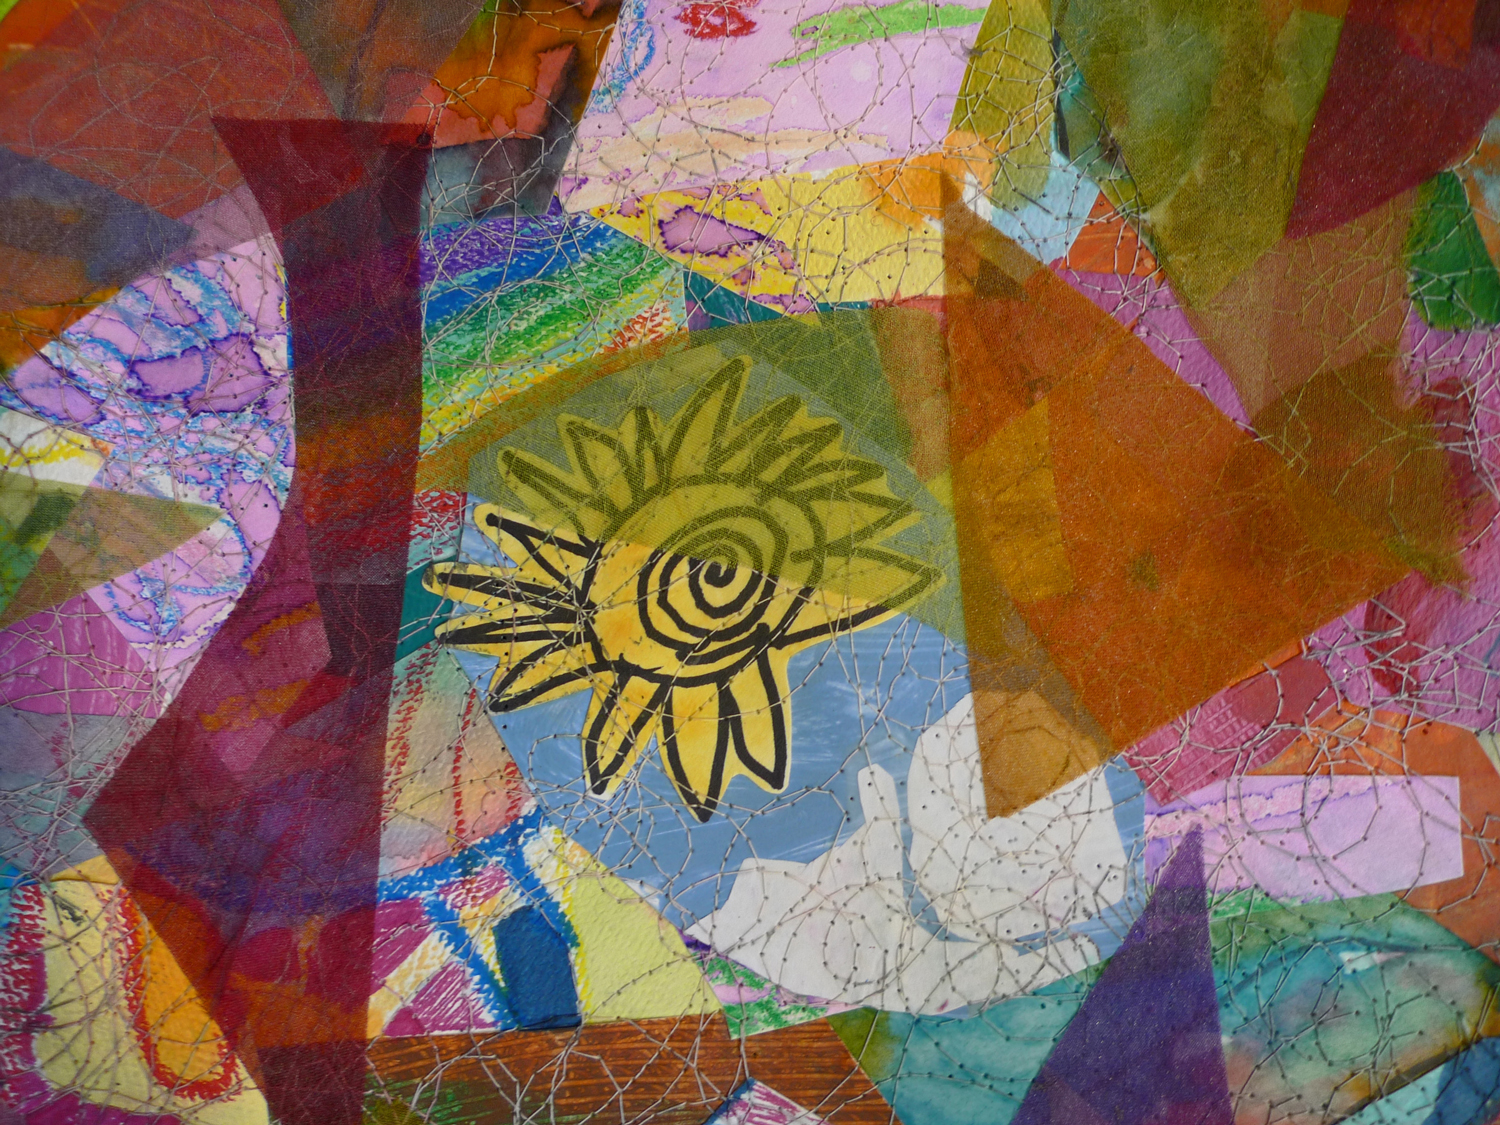
During a snowstorm in 2015, I had the honor of collaborating with my 7 year old, Mazzy, on a project utilizing her preschool and kindergarten drawings and paintings. We had a towering stack of drawings and paintings that she had completed in preschool and Kindergarten. Due to the use of lower quality papers and temper paints, many of the pieces were deteriorating over time. She selected her favorite pieces to keep. The other pieces we photographed and then used in a collaboration called Mazzy's Sketches.
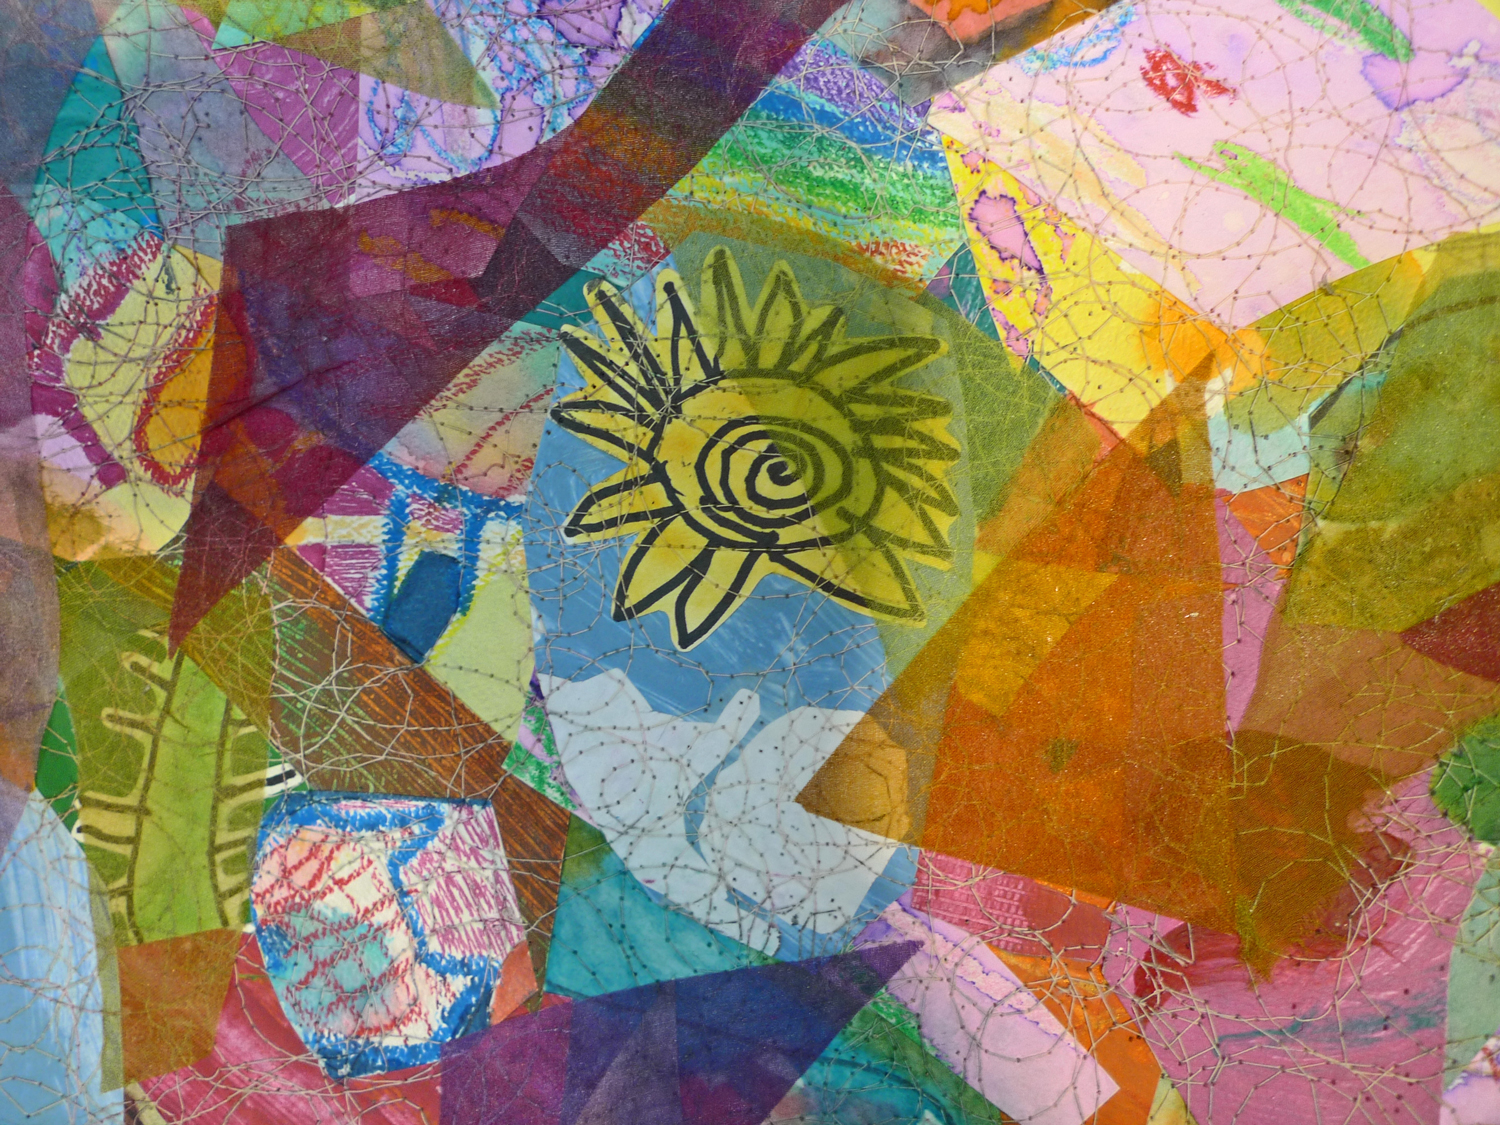
Mazzy cut her drawings and paintings into various geometric shapes. She then collaged them on to heavy watercolor paper using PVA glue. To preserve the paint and papers, I coated the collage with Matte Gel Medium. Once dry, I heat adhered silk organza I had previously dyed with fiber reactive dyes to Pellon 805 Wonderunder. Mazzy then cut geometric shapes from the Pellon backed silk organza and I helped her adhere them to the collage with a heated iron.
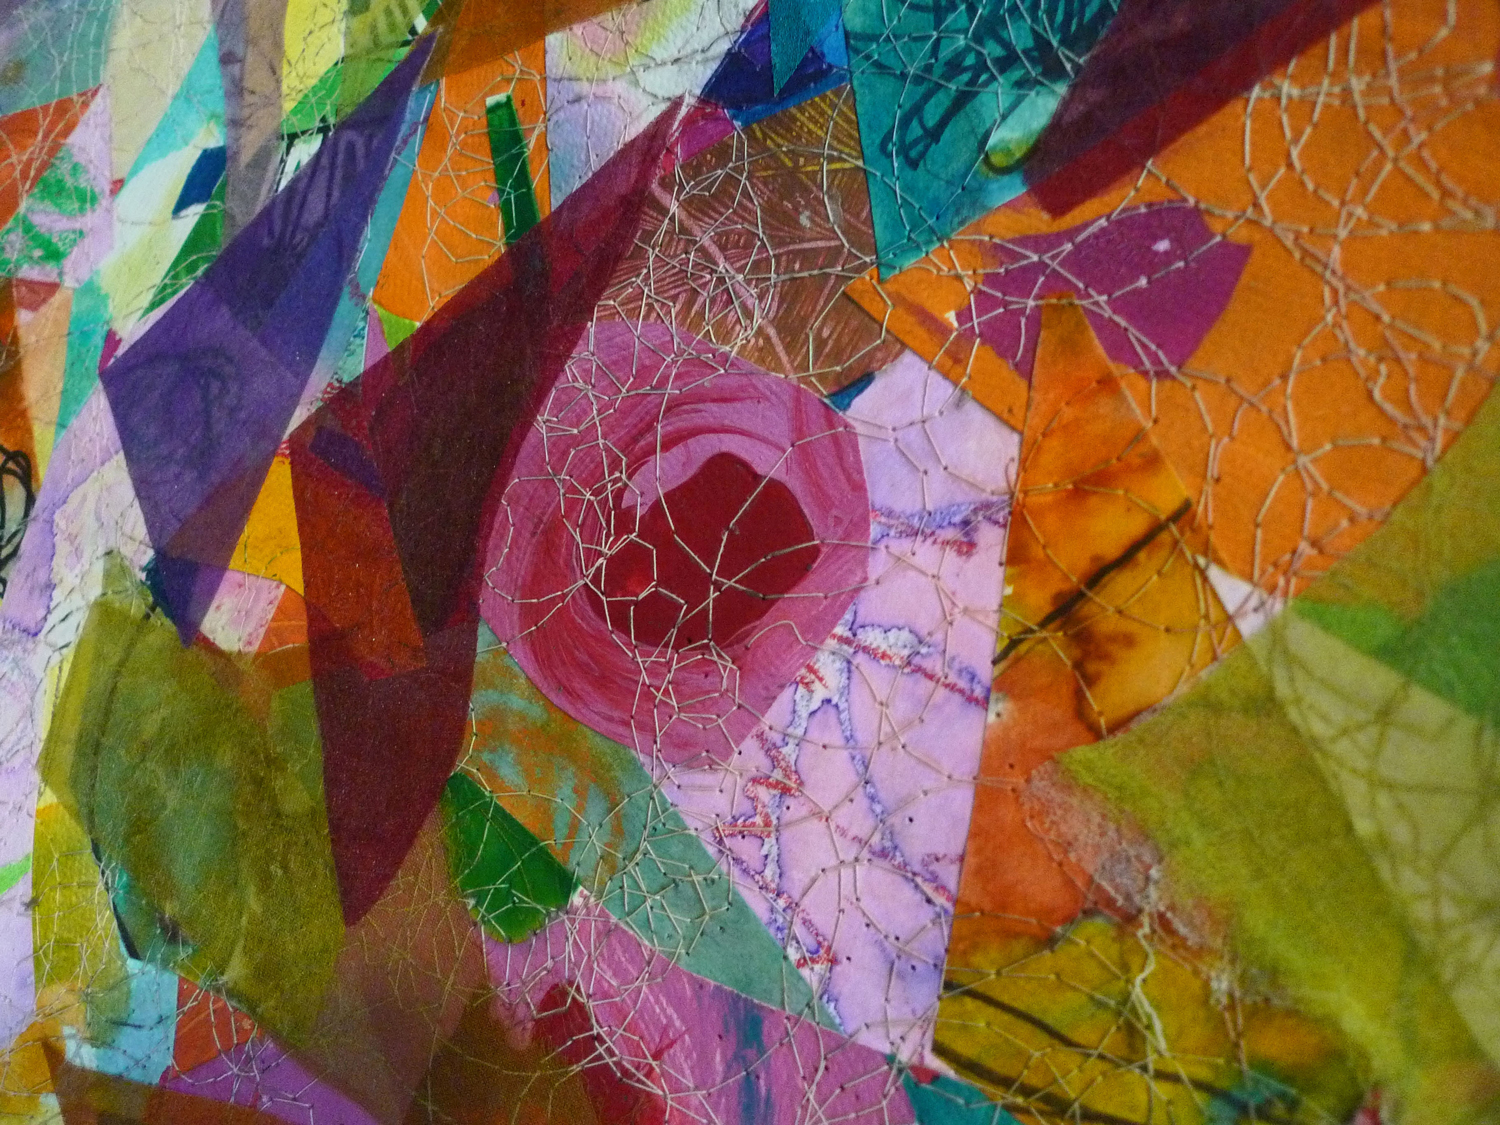
Gluing a layer of mid-weight cotton fabric to the back of the collaged watercolor paper added a more secure foundation to stitch through. Once the PVA glue dried, I then used a rotary cutter to slice the collage in to rectangles. We then arranged the rectangles in a pattern that we both liked. To add additional texture and further secure the layers together, we took turns using free motion machine stitching. The free motion stitching also connected the rectangles to each other in a panel.
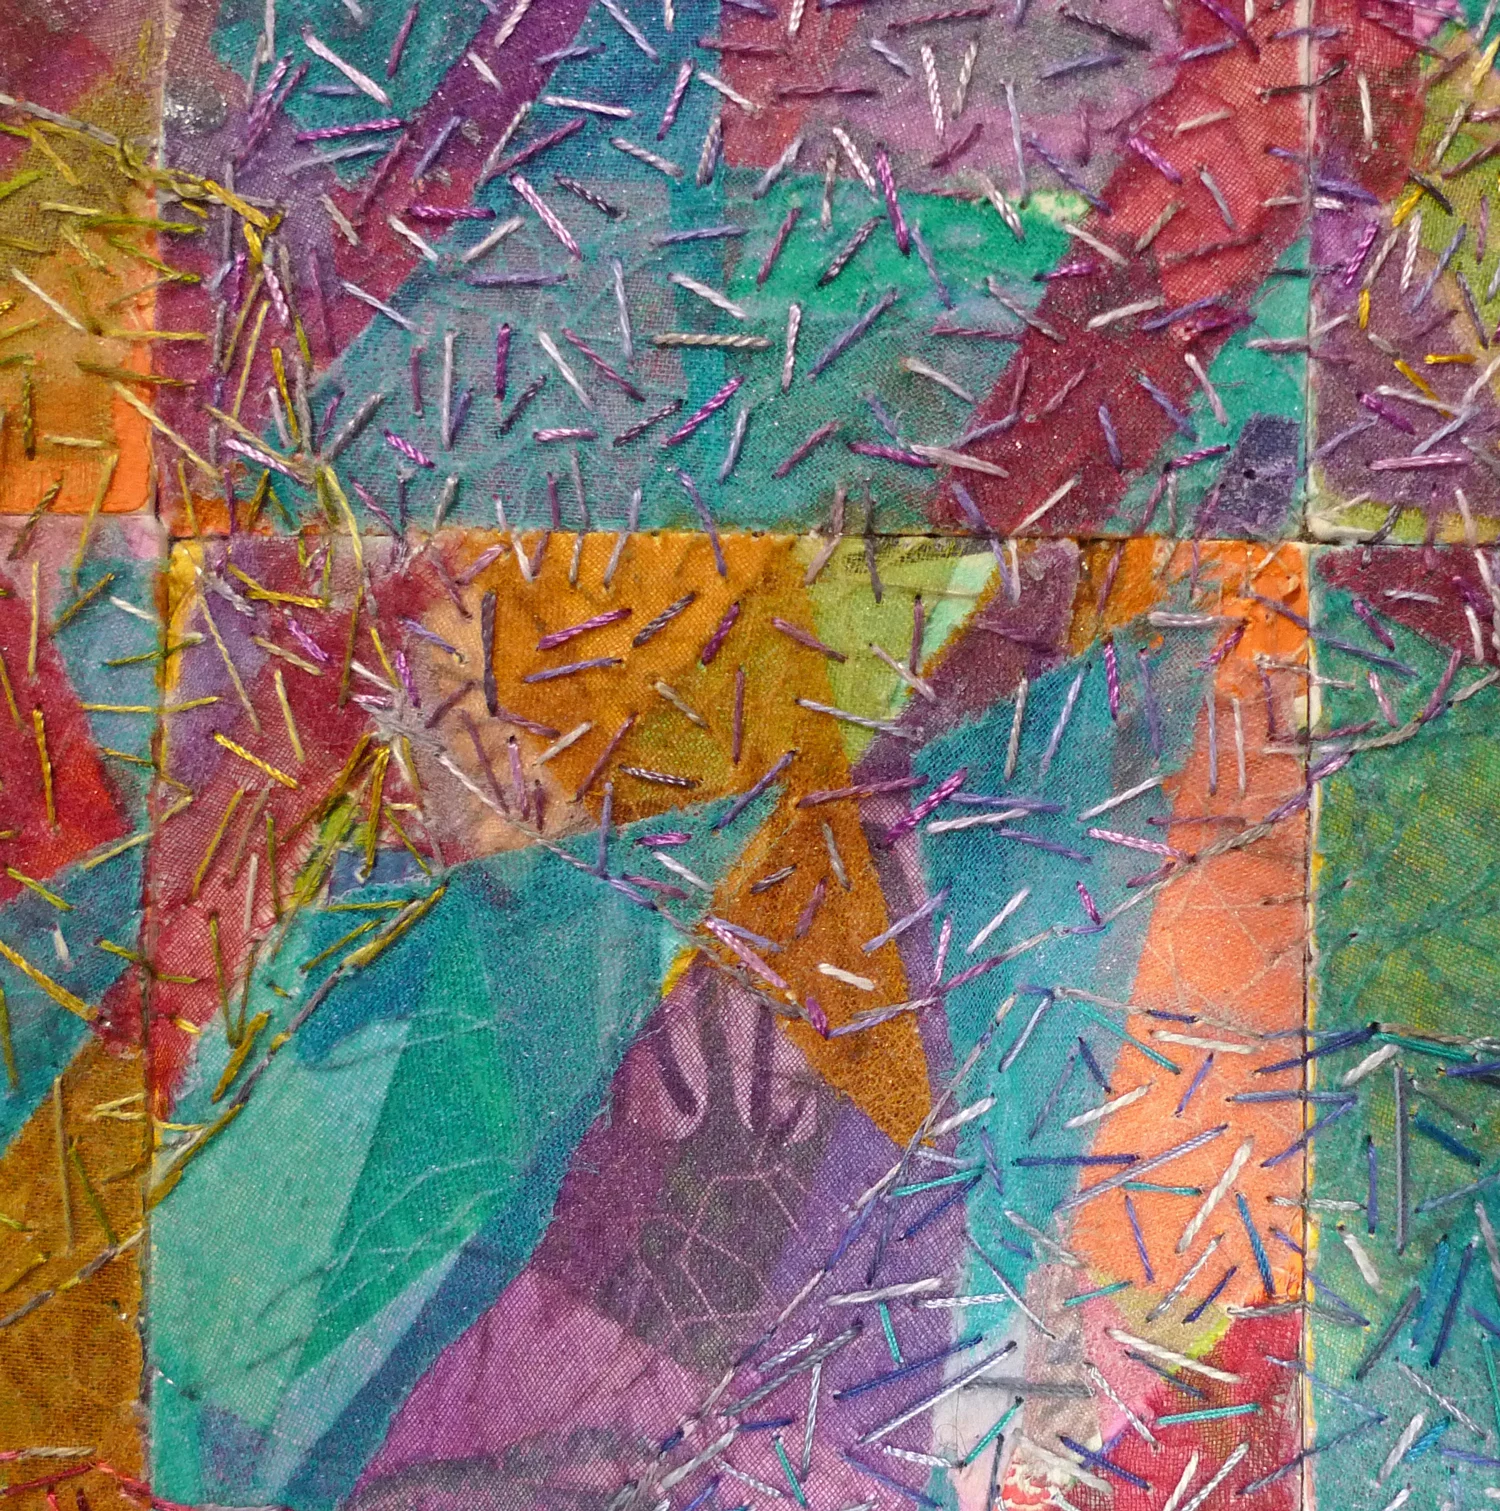
I then hand stitched hexagons in a flowing pattern across the panel using a rainbow of embroidery threads.


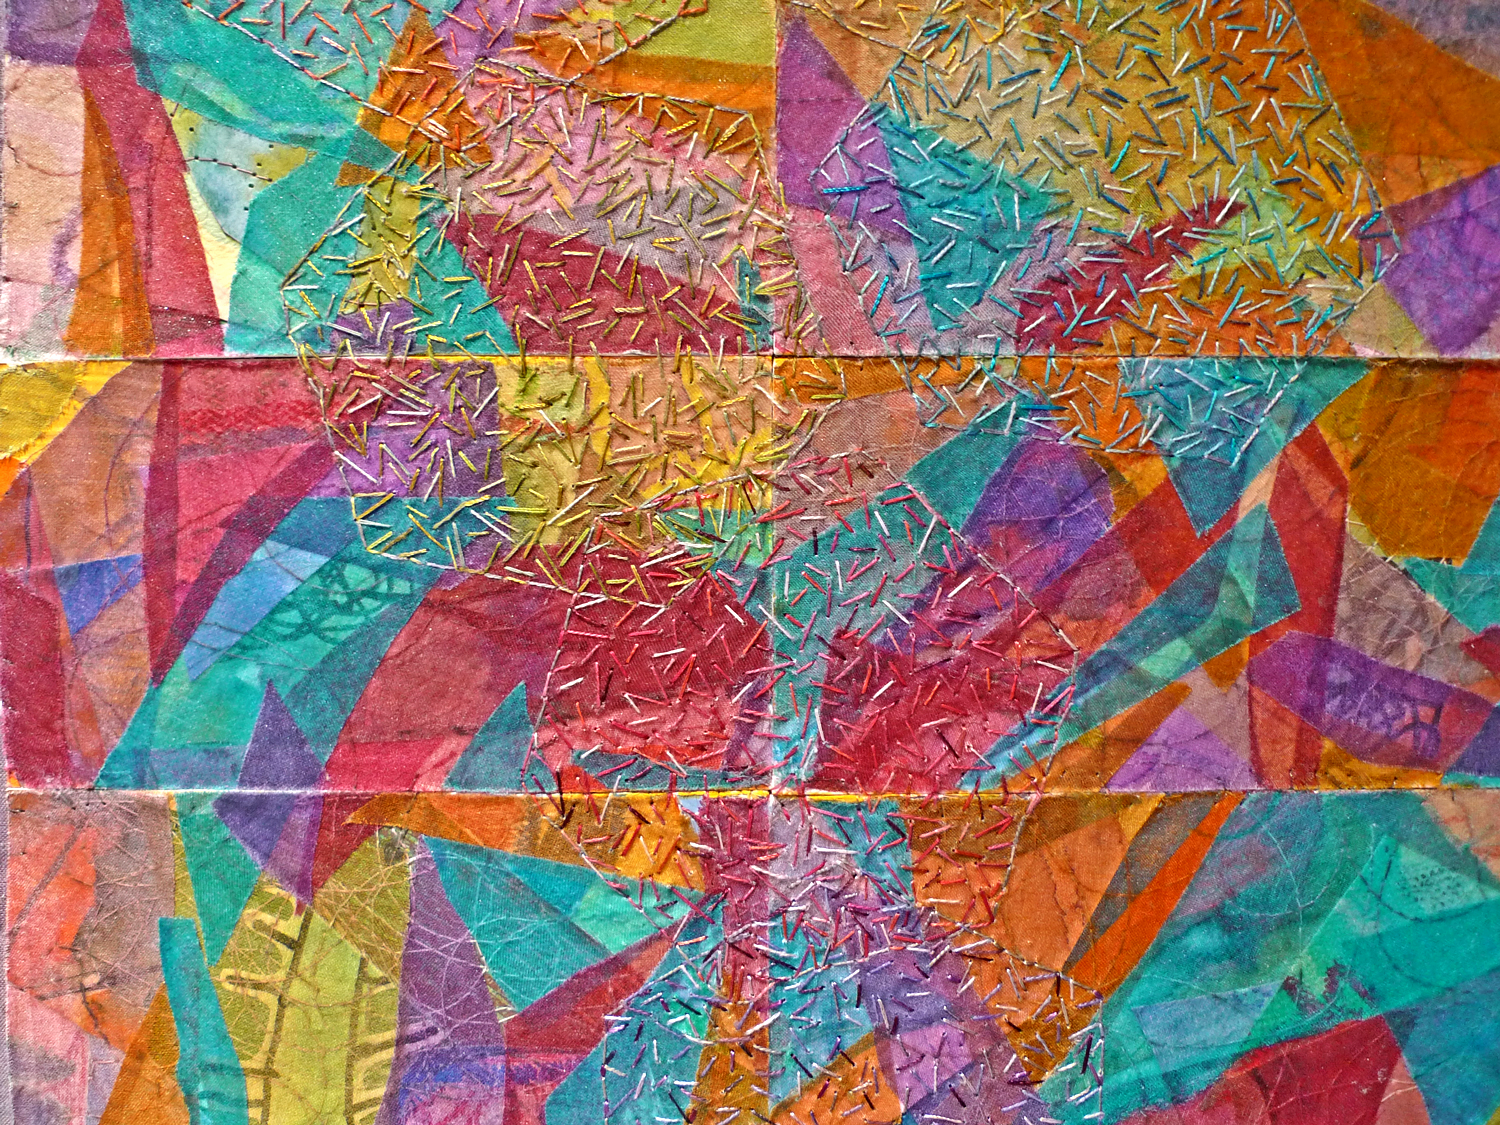

I hand dyed a background fabric using fiber reactive dyes. I hemmed the fabric edges and added a rod pocket for display. Finally, I adhered the panel to the background fabric using smoky invisible thread and a stitch in the ditch quilting concept to hide the method of attachment. Due to the overall size of the project I have been unable to get a clear picture of the complete project. Therefore, all of my photos are currently of the panel before attaching to the background fabric. I will experiment further in methods of photographing large pieces clearly.
Collaborating with my daughter was both a fun and frustrating experience due to her young age. I am happy that we were able to create this piece together. Mazzy was thrilled when I displayed this piece in a show of my work. Perhaps at the end of elementary school we will come up with another project for her first through fifth grade drawings.
Hand Stitching Helpers
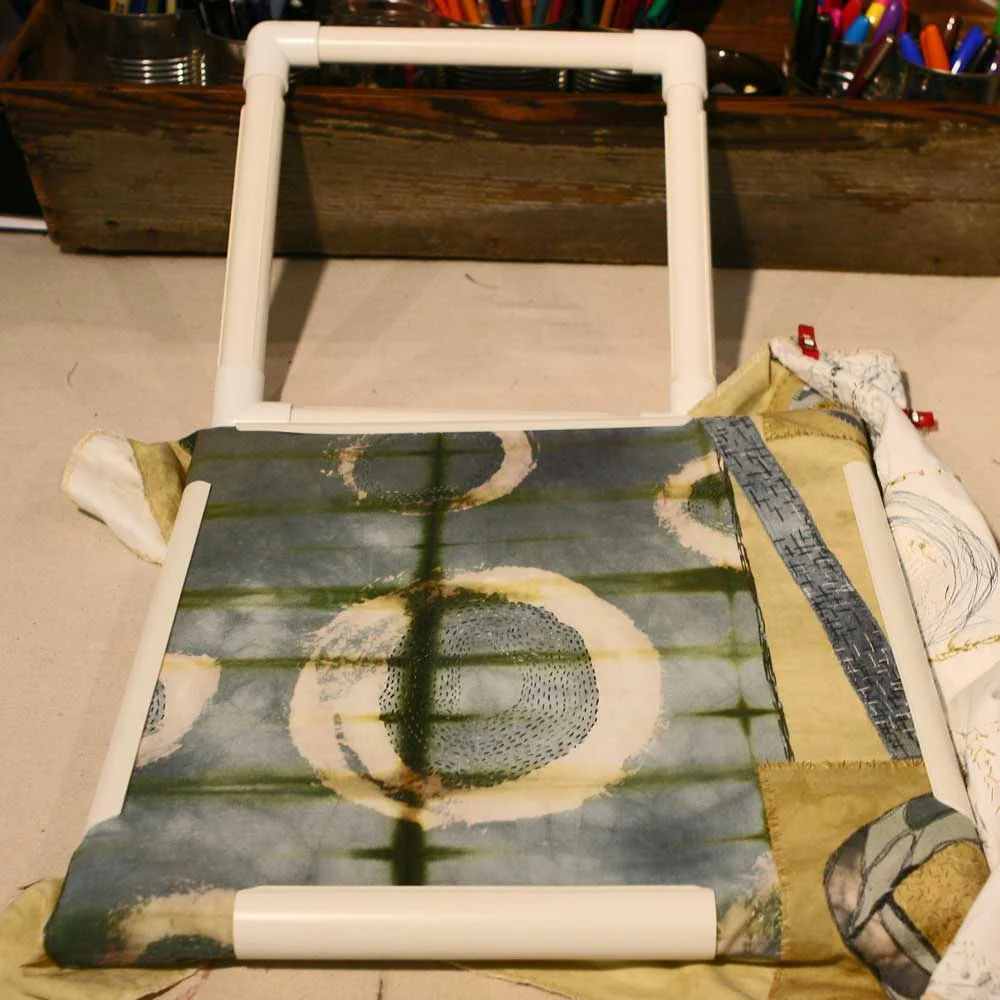
I am very frugal in buying only things I know I will use. So, since I already had various size round embroidery hoops I kept putting off buying the square one I really wanted. As a designer, I like to see how each stitch I add contributes to the piece. This was hard for me to visualize in the round. I knew it would be easier to get a sense of the larger piece in a square as I am used to using the concept of a view finder for art compositions. I finally decided to buy the square and have never second guessed my decision. I LOVE LOVE LOVE it! OK, so I am a weird person who gets excited over art supplies. I was also the kid that loved getting new school supplies each year so no big surprise. My first square was the Dritz Quilting Quilt N'Go Lap Frame 11"x11" . It was the perfect solution to managing the fabric for the pieces I was hand stitching.
I am very frugal in buying only things I know I will use. So, since I already had various size round embroidery hoops I kept putting off buying the square one I really wanted. As a designer, I like to see how each stitch I add contributes to the piece. This was hard for me to visualize in the round. I knew it would be easier to get a sense of the larger piece in a square as I am used to using the concept of a view finder for art compositions. I finally decided to buy the square and have never second guessed my decision. I LOVE LOVE LOVE it! OK, so I am a weird person who gets excited over art supplies. I was also the kid that loved getting new school supplies each year so no big surprise. My first square was the Dritz Quilting Quilt N'Go Lap Frame 11"x11" . It was the perfect solution to managing the fabric for the pieces I was hand stitching.
I use three layers of fabric joined with either 505 Spray or Wonder Under so I don't need a frame for free motion stitching on my machine. The Quilt 'N Go won't fit under my machine foot so I would have to resort to a thinner round hoop if I needed a frame.
My next piece was larger so I decided to invest in a second larger frame. I made the mistake of running with my Michael's coupon and buying a similar product: Loops & Thread Plastic Snap Frame. Bad choice. The frame was flimsy and the snap covers were so tight it actually damaged the weave of my fabric. I quickly returned that piece of junk. I then purchased the Dritz Quilting Quilt N' Go Lap Frame in the 14" x 14" size. There was little different in price between the two brands and the Dritz was far superior in quality.
It would be nice if Dritz sold connectors so you could add pieces together for different size or shape. I have not taken it with me to a hardware store yet to see if a standard pvc connector would work.
For any extra fabric on the edges that still got in my way I would roll the fabric and use Clover Wonder Clips. I have not seen the Clover Jumbo Wonder Clips in person to judge if they would be better or too big for most of my pieces.
In the future, I will use the Lap Frame for any projects that need the assistance of a frame for manageability.
Completed Class Project
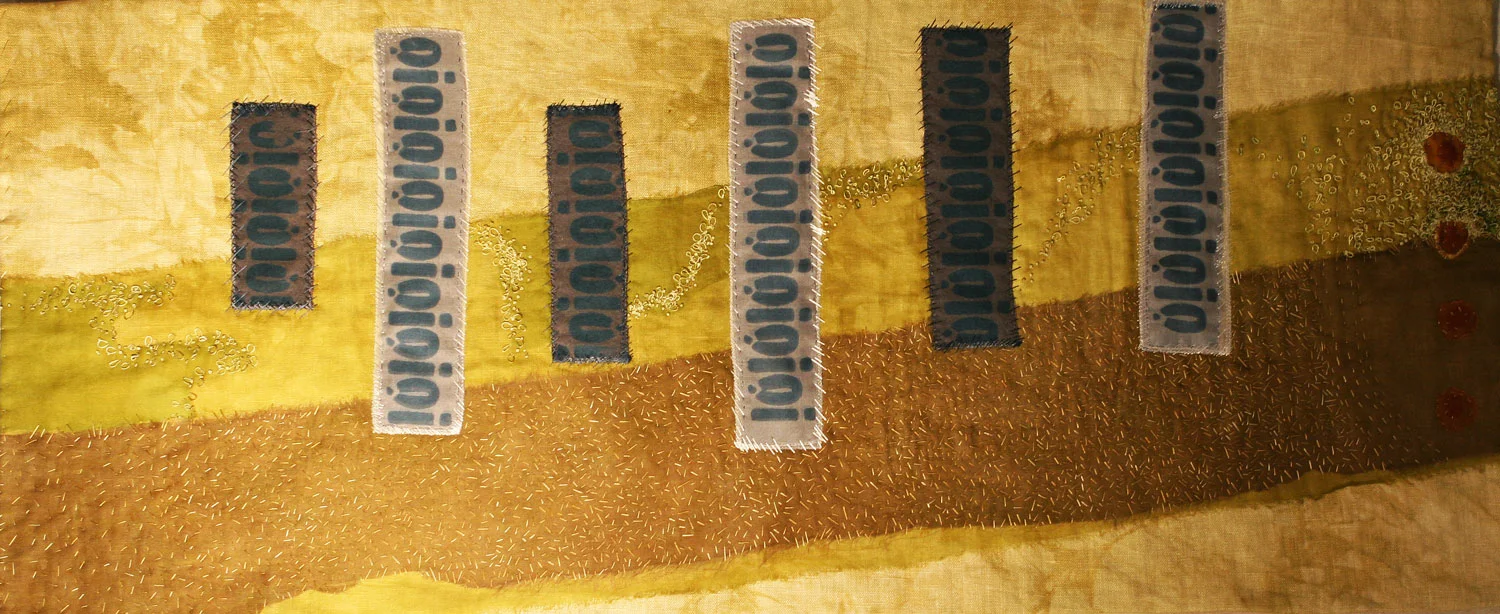
Timeline is my finished project from the Peg Gignoux workshop. Using the techniques she taught in class, I completed this piece which is quite different from my previous projects. My inspiration for this piece came from a photo I took on one of my morning walks on Whidbey Island.
Timeline is my finished project from the Peg Gignoux workshop. Using the techniques she taught in class, I completed this piece which is quite different from my previous projects. My inspiration for this piece came from a photo I took on one of my morning walks on Whidbey Island.
I took both linear elements and color concepts from this photo and incorporated them into my class project (Timeline).
The silk organza, linen, and silk threads were all dyed using Fiber Reactive Procion Type Dyes. The symbols are silk screened using thermofax screens that I borrowed from Peg Gignoux. A base layer of machine stitching anchors the layers. Utilizing the silk thread I dyed, I created a layer of mark making to add texture and depth.
In this piece I was practicing mark making utilizing hash marks, varied loops, as well as french knots. The combination of the silk organza, linen, and felt materials allowed me to play with the impact of varied materials.
For the raw edge applique, I watered down matte medium and applied it to the edges to help prevent further fraying. This worked somewhat but I would apply it multiple times before appliqueing the pieces to the background in the future. Another option would be to use Pellon 805 Wonder Under instead of the Matte Medium.
While there are a number of things I would do differently in retrospect, I am happy with the overall success of the piece. My main objective was to try something outside my comfort zone and this piece was definitely the push that I needed.
Textile Dyeing & Collage with Peg Gignoux
My class at The Pacific Northwest School of Art was taught by Peg Gignoux. I had first admired her work locally at Light Art Design during the STITCH exhibit. Ironically, she lives about 30 minutes from me but I flew cross country to attend the only workshop she had scheduled in the USA for 2014. I am very happy with that decision, as it was exactly the workshop I needed as well as being introduced to PNSA. You can view Peg Gignoux's work on her website http://www.ingignouxity.com.
My class at The Pacific Northwest School of Art was taught by Peg Gignoux. I had first admired her work locally at Light Art Design during the STITCH exhibit. Ironically, she lives about 30 minutes from me but I flew cross country to attend the only workshop she had scheduled in the USA for 2014. I am very happy with that decision, as it was exactly the workshop I needed as well as being introduced to PNSA. You can view Peg Gignoux's work on her website http://www.ingignouxity.com. The course description for the class, Textile Dyeing & Collage read as follows: "Explore the translucence and luster of silk of many weights and hues. We will hand dye silk thread and lengths of organza and habotai creating a vivid collection of fabrics to layer and stitch to linen, to cotton, to paper! Create complex colors as you blend materials, cut and redefine the surface. Add in vintage maps, old lace, antique letters and find your way into a series of expressive mixed media collages. We will play with innovative ways to work hand and/or machine stitches into the surface of each composition." (PNSA & Peg Gignoux)
In the class we covered stamping, silk screening with thermofax screens, dyeing silk fabric and thread, hand stitching, layering of organza, and basic collage techniques. We were unable to learn how to make the thermofax screens since the school did not have a thermofax machine. However, it sounded like after the class that they were going to try to include it in their future budget to obtain one for class use.
One of the products that was introduced in the class that I have used extensively since the class instruction is Pellon 805 Wonder Under which is a paper backed fusible web interfacing. I had previously used 505 Spray for join fabrics prior to sewing. However, the Wonder Under works much better for sheer fabrics and controlling frey in raw edge applique. During the class I was also converted to using multiple layers of cotton or linen fabric instead of using batting. For stiffer applications we included Watercolor Paper. Both options made it much easier to pull the silk thread through when hand-stitching.
I started experimenting with color manipulation with varied layers of silk organza during the class and plan to experiment more with this technique in one of my next projects.