Inspired by Plywood
Every day we walk through life seeing ordinary objects. But only occasionally do we stop and enjoy their beauty.
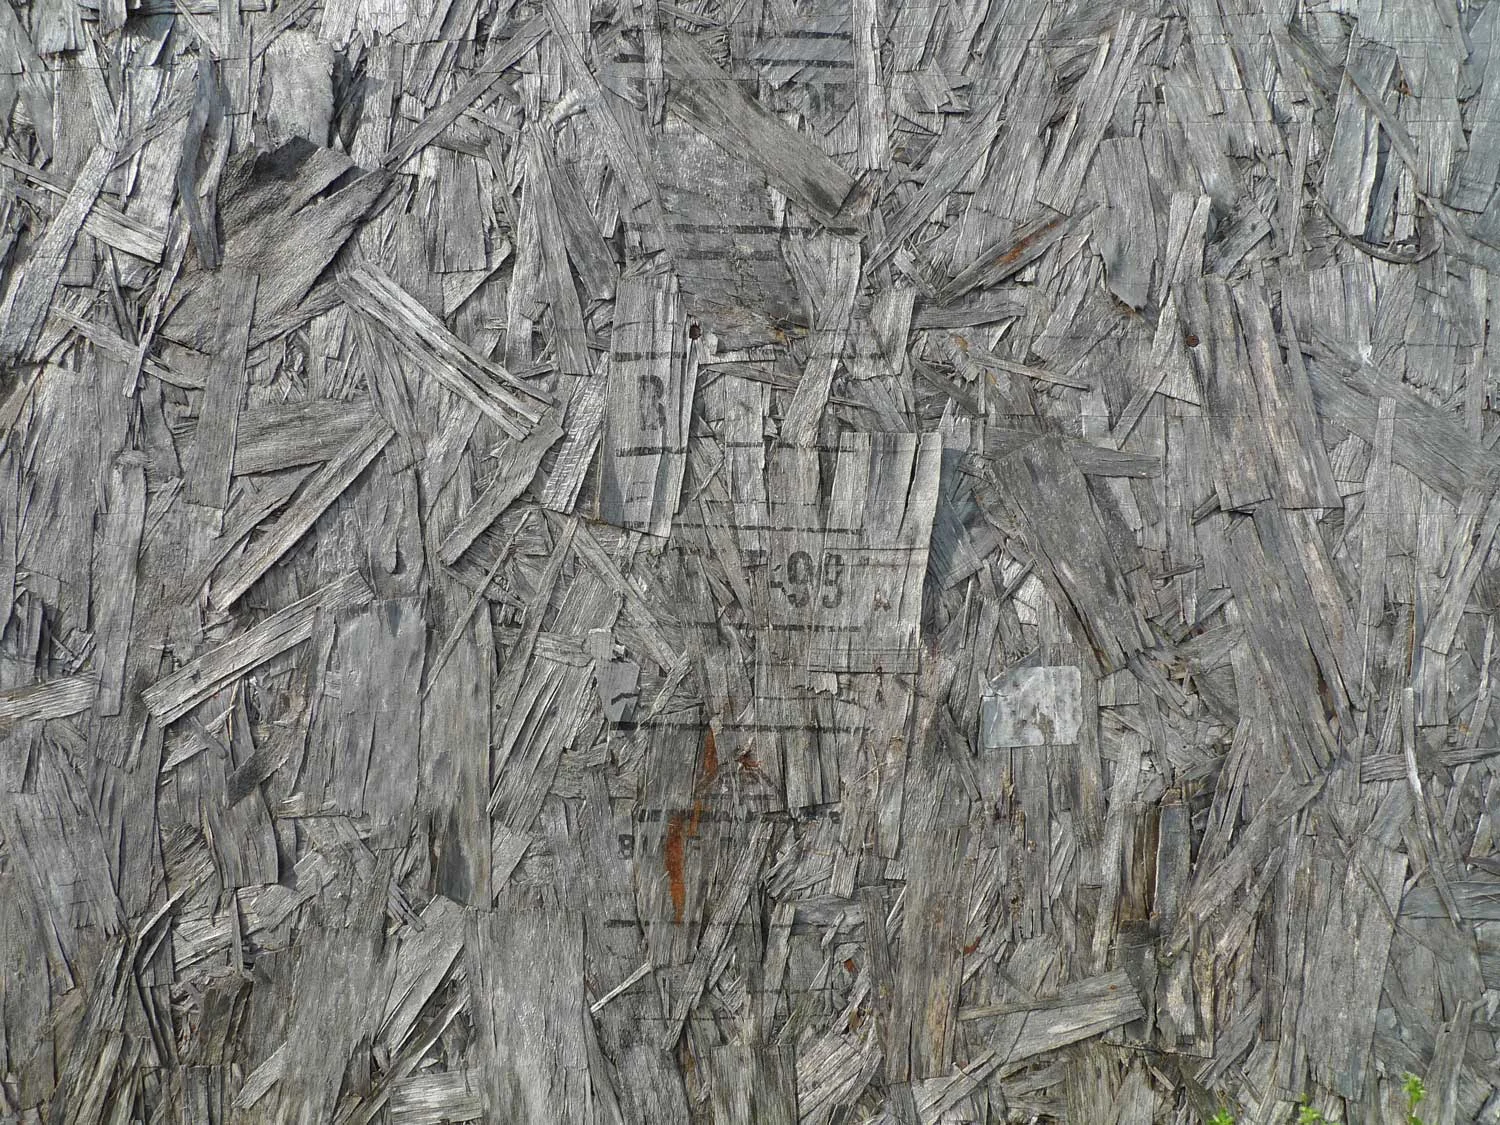
While walking around my dad's barn, I was lucky to see this weathered grey piece of plywood glistening in the sun. The varied greys and organic lines of the wood pieces contrasted with the stamped symbols. Weathering had warped the individual splinters of wood creating a dynamic texture.
I wanted to translate the individuality of the splinters into a harmonious collage in fabrics.
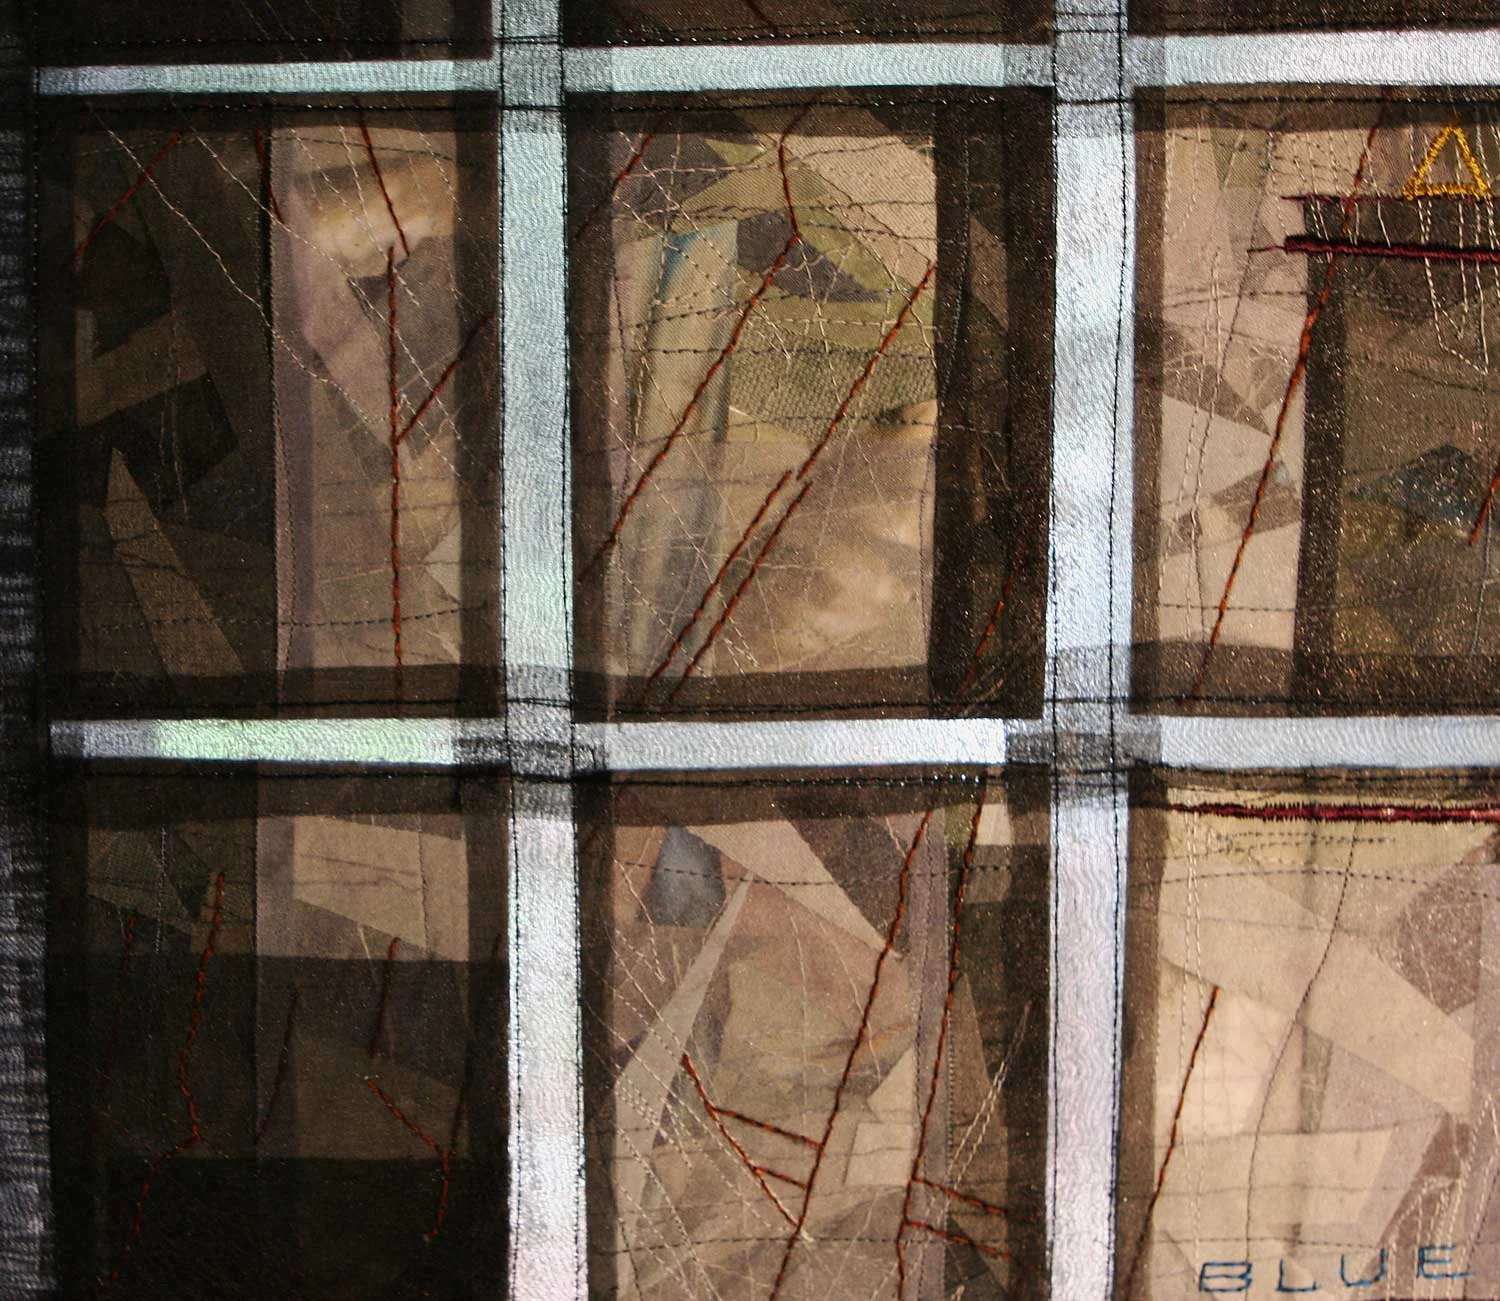
I started dyeing various colors of grey fabrics. In my quest to obtain greys, I created a range of greys from green to blue. Once I had my symbolic plywood base from dyed fabrics, I started thinking of ways to maintain some aspects of the plywood that I liked. I chose to represent the weathered look of the plywood by layering hand-dyed organza on top of my symbolic plywood base. This softened the sharp lines in the collage. I was surprised by the map-like quality the collage had taken on unexpectedly.
The grain of the wood is interpreted in machine stitching. Several strong lines from the photo are hand-stitched as well as my representation of the stamped symbols.

Though hard to photograph, my plywood shapes are encased in black organza so the light comes through the panels to mimic the way the sun glistened on the plywood that day.
Making a Child's Dress Form
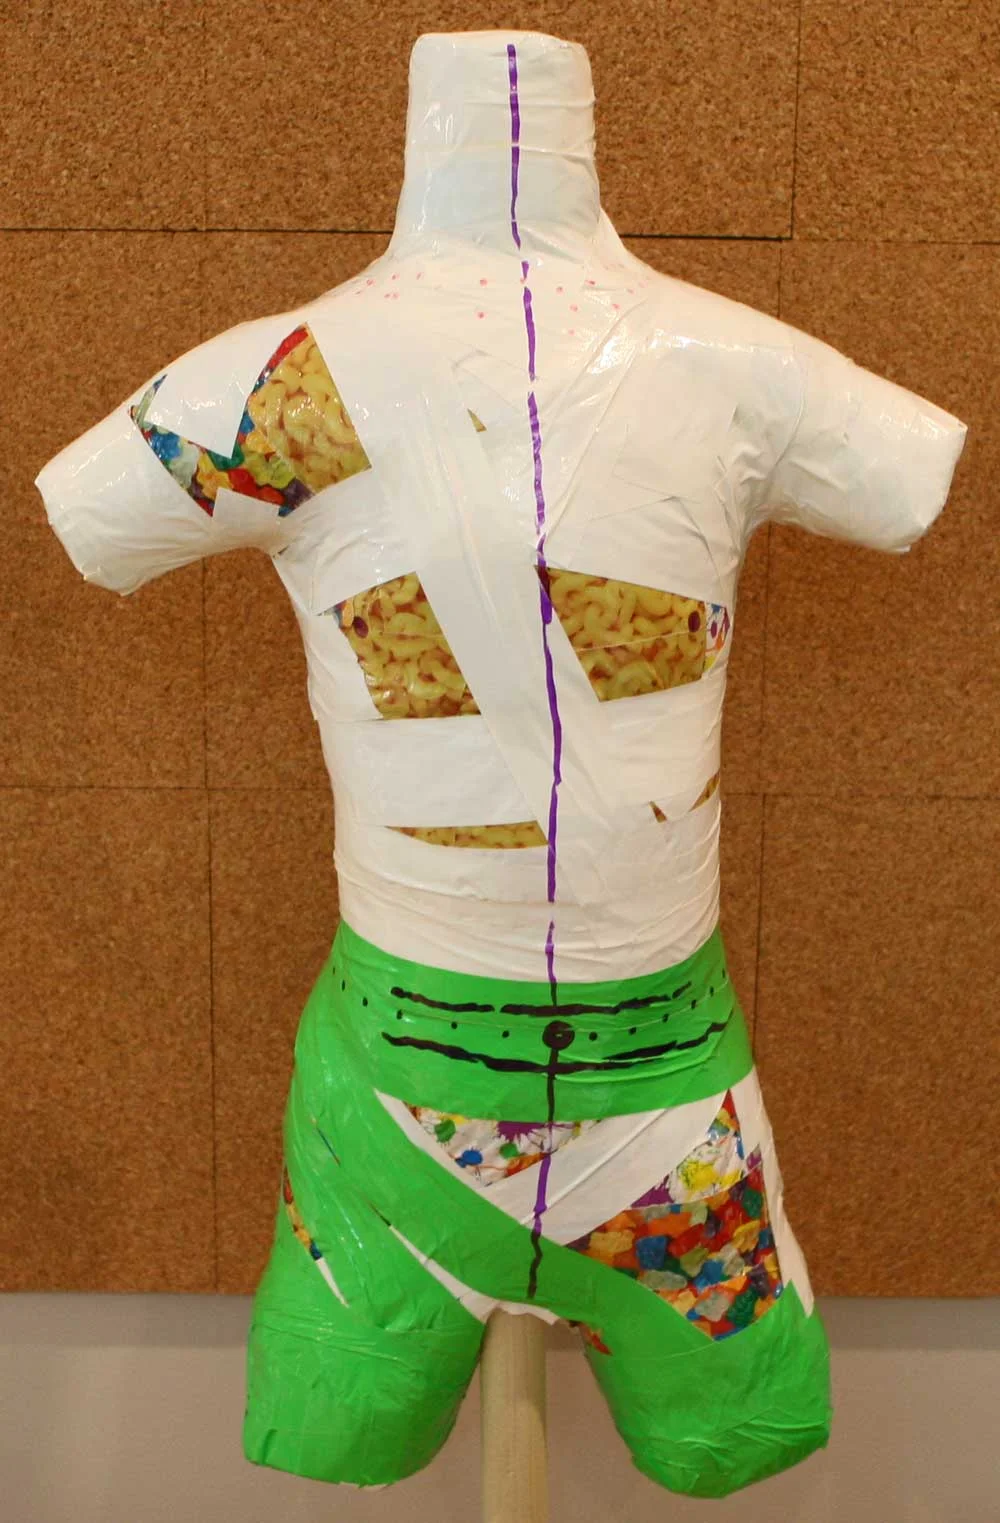
My 7 year old hates for me to keep trying clothes on her when I am making her something new. So, I decided to try making a duct tape dress form of her. Making the dress form is a easy concept for an adult model. However, for even a well behaved 7 year old I would say Don't Try this at Home. Well, at least make sure you have a nice bottle of wine for you and ice cream for the kid to look forward to when it is over. It only took an hour to get the shell done but that is still a long time to get a kid to stand still without wiggling while you are mummifying them in duct tape. Also, the smell of the massive amount of duct tape is a bit overwhelming for an adult and more so for a kid.
My 7 year old hates for me to keep trying clothes on her when I am making her something new. So, I decided to try making a duct tape dress form of her. Making the dress form is a easy concept for an adult model. However, for even a well behaved 7 year old I would say Don't Try this at Home. Well, at least make sure you have a nice bottle of wine for you and ice cream for the kid to look forward to when it is over. It only took an hour to get the shell done but that is still a long time to get a kid to stand still without wiggling while you are mummifying them in duct tape. Also, the smell of the massive amount of duct tape is a bit overwhelming for an adult and more so for a kid.
Otherwise, it was an easy concept. It took me more duct tape than I expected for a kid size form. I used almost 5 rolls total but the decorative tapes were smaller rolls. I also used two bags of 20 oz Polyfill. I repurposed a wooden wire spool for the base and used a large wooden dowel for the post.
My daughter helped with the tape and did a little decorating on it so it has the look of a homemade cake but the shape is correct.
I read all the various how to's online and then decided to make mine a little different. With a child the top of the arm fit and the top of the leg fit are very important for comfort. So, I did not feel the simple torso to hips form was enough. I had her put on an outgrown long sleeve top and long pants so they fit snuggly. Then, I wrapped her in duct tape. Most people seem to cut down the back but with the leg and arm I decided to cut down one side. With a side seam, she was then able to slip out of the other side while it remained intact. I started from the top taping the the form back together and then stuffed from the bottom. I stuffed plastic bags in the open end of the arms and legs and then taped over them with duct tape. I stuffed the form with two bags of polyfoam so it is very stiff. I then inserted the wooden dowel and taped the form closed at the bottom. The dowel then slips into the wooden wire spool so the form stands up straight and does not tip over. Afterwards, I double checked the form to her measurements. Make sure to mark bellybutton, nipples, and center of front and back with a Sharpie. Children's dress forms appear to usually be more expensive than adult forms so I am glad to have this done until she changes sizes. I may be able to pad and tape this form as needed as she grows. I will keep you posted.
Hand Stitching Helpers
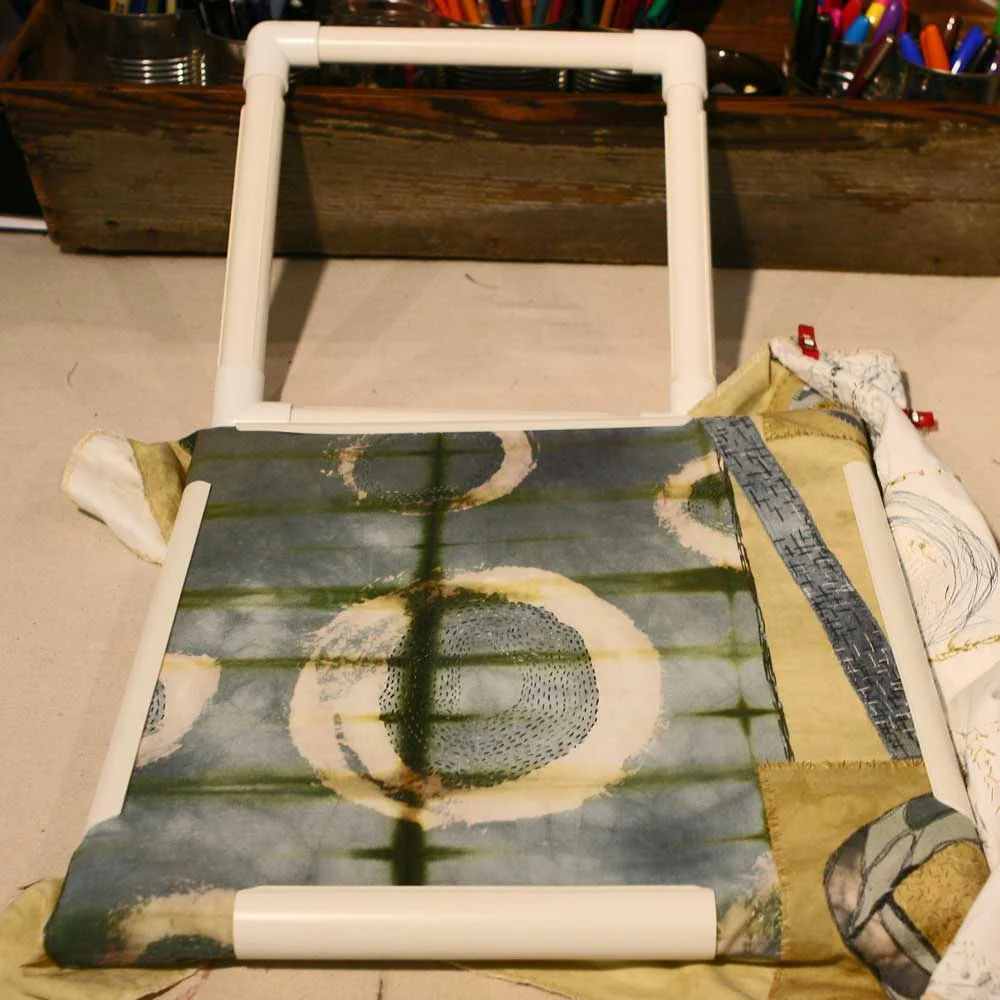
I am very frugal in buying only things I know I will use. So, since I already had various size round embroidery hoops I kept putting off buying the square one I really wanted. As a designer, I like to see how each stitch I add contributes to the piece. This was hard for me to visualize in the round. I knew it would be easier to get a sense of the larger piece in a square as I am used to using the concept of a view finder for art compositions. I finally decided to buy the square and have never second guessed my decision. I LOVE LOVE LOVE it! OK, so I am a weird person who gets excited over art supplies. I was also the kid that loved getting new school supplies each year so no big surprise. My first square was the Dritz Quilting Quilt N'Go Lap Frame 11"x11" . It was the perfect solution to managing the fabric for the pieces I was hand stitching.
I am very frugal in buying only things I know I will use. So, since I already had various size round embroidery hoops I kept putting off buying the square one I really wanted. As a designer, I like to see how each stitch I add contributes to the piece. This was hard for me to visualize in the round. I knew it would be easier to get a sense of the larger piece in a square as I am used to using the concept of a view finder for art compositions. I finally decided to buy the square and have never second guessed my decision. I LOVE LOVE LOVE it! OK, so I am a weird person who gets excited over art supplies. I was also the kid that loved getting new school supplies each year so no big surprise. My first square was the Dritz Quilting Quilt N'Go Lap Frame 11"x11" . It was the perfect solution to managing the fabric for the pieces I was hand stitching.
I use three layers of fabric joined with either 505 Spray or Wonder Under so I don't need a frame for free motion stitching on my machine. The Quilt 'N Go won't fit under my machine foot so I would have to resort to a thinner round hoop if I needed a frame.
My next piece was larger so I decided to invest in a second larger frame. I made the mistake of running with my Michael's coupon and buying a similar product: Loops & Thread Plastic Snap Frame. Bad choice. The frame was flimsy and the snap covers were so tight it actually damaged the weave of my fabric. I quickly returned that piece of junk. I then purchased the Dritz Quilting Quilt N' Go Lap Frame in the 14" x 14" size. There was little different in price between the two brands and the Dritz was far superior in quality.
It would be nice if Dritz sold connectors so you could add pieces together for different size or shape. I have not taken it with me to a hardware store yet to see if a standard pvc connector would work.
For any extra fabric on the edges that still got in my way I would roll the fabric and use Clover Wonder Clips. I have not seen the Clover Jumbo Wonder Clips in person to judge if they would be better or too big for most of my pieces.
In the future, I will use the Lap Frame for any projects that need the assistance of a frame for manageability.
Dyeing Thread
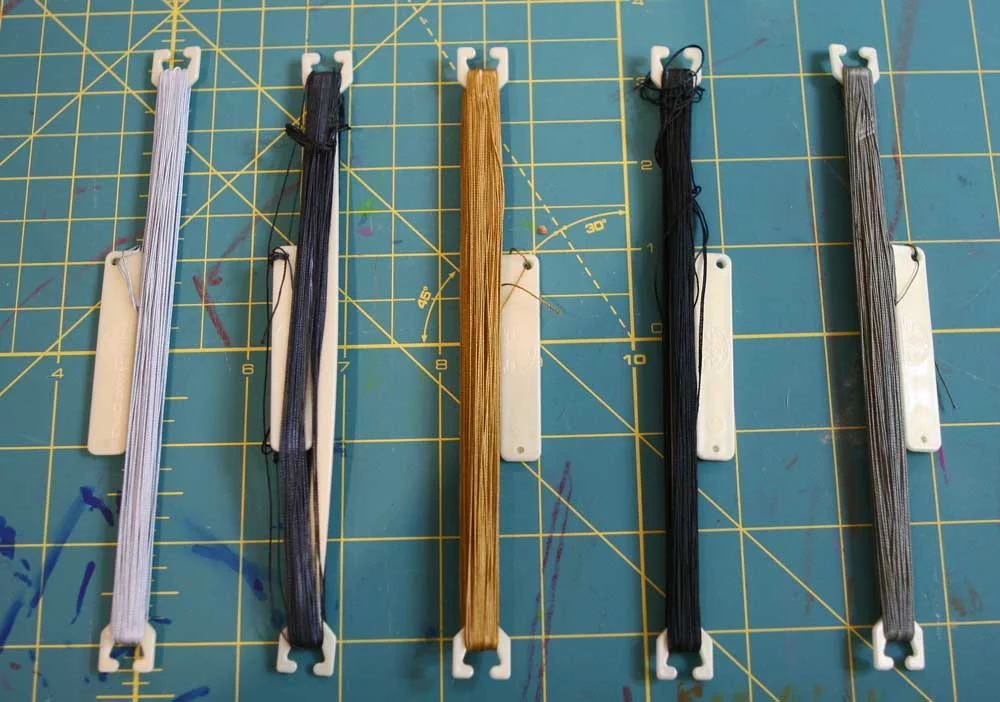
While perusing the latest Quilting Arts Magazine I was inspired to experiment with dyeing cotton thread using DMC Floss Holders after reading Thread Dyeing 101: Two Approaches by Carol Soderlund and Melanie Testa. I really want to work more in dyeing silk thread after my class with Peg Gignoux. However, this was a quick and cheap experiment since I could get all the materials on sale at Jo-Ann's with their million coupons. For the experiment I used DMC StitchBow Floss Holders and DMC Pearl Cotton Size 12 in White.
While perusing the latest Quilting Arts Magazine I was inspired to experiment with dyeing cotton thread using DMC Floss Holders after reading Thread Dyeing 101: Two Approaches by Carol Soderlund and Melanie Testa. I really want to work more in dyeing silk thread after my class with Peg Gignoux. However, this was a quick and cheap experiment since I could get all the materials on sale at Jo-Ann's with their million coupons. For the experiment I used DMC StitchBow Floss Holders and DMC Pearl Cotton Size 12 in White.
Because I generally dye in small batches, my go to book for Dyeing Recipes is Color By Accident (Low-Water Immersion Dyeing) by Ann Johnston. I wanted to experiment with colors to coordinate with some fabrics I had previously dyed in my Grey Experiment which I will detail in a subsequent post.
It is very important to take notes while you are dyeing or you will never remember dye stock amounts, dye bath timing, etc. TRUST ME!!!! YOU WILL NOT REMEMBER! I number my dye buckets or my ziplock bags with a Sharpie and then make notes in a notebook for corresponding dye stock amounts and timing.
Thread Dyeing Steps:
- wrap the thread in manageable lengths on the floss holders
- prewash the wrapped floss holders in the sink with hot water and Synthrapol
- soak wrapped floss holders in Soda Ash solution
- prepare dye stock
- decide on development time and dye stock amounts
- make note of time & dye stock amounts selected (you will never remember later so take the time to do this now before you don your rubber gloves again)
- Measure out Soda Ash solution into number buckets
- Add dye stock
- Time for desired length of time
- Drain bucket or bag
- Rinse wrapped floss holders with alternating hot and cold water until the water runs clear
- Wash wrapped floss holders by hand with Synthrapol and hot water
- Rinse
- Hang to dry
Dyed Thread 1-5 left to right
For the above threads I used 1/2 cup of Soda Ash Solution and Soaked for 15minutes.
Dye Stock Amounts for 1-5 (left to right) See Current Dye list for Experiments for additional info on Dye:
- G&K 6160 Stormy Grey 1/4 tsp
- Dharma 44 Better Black 1/4 tsp
- G&K 5193 Bronze 1/4 tsp
- Mix of Dharma 23 Cerulean Blue 1/4 tsp & Dharma 44 Better Black
- Pre Dyed in #3 then quick overdye dip in #4
I found that the dye coverage was basically consistent. I like irregularity so I wasn't trying for perfect color but with little to no effort other than wrapping loosely and agitating the dye bath once or twice the color was still pretty consistent. Wrapping tighter or wrapping longer length of thread might cause more irregularity so keep that in mind based on the results you want. After dyeing, the thread did not fuzz and sews well on the current project I am testing it on. I was happy with the way the floss holders managed the thread for dyeing and storage. They can easily be reused. Braiding lengths works well for times I want more variegation but the floss holders worked well for me for a more uniformed color.
Completed Class Project
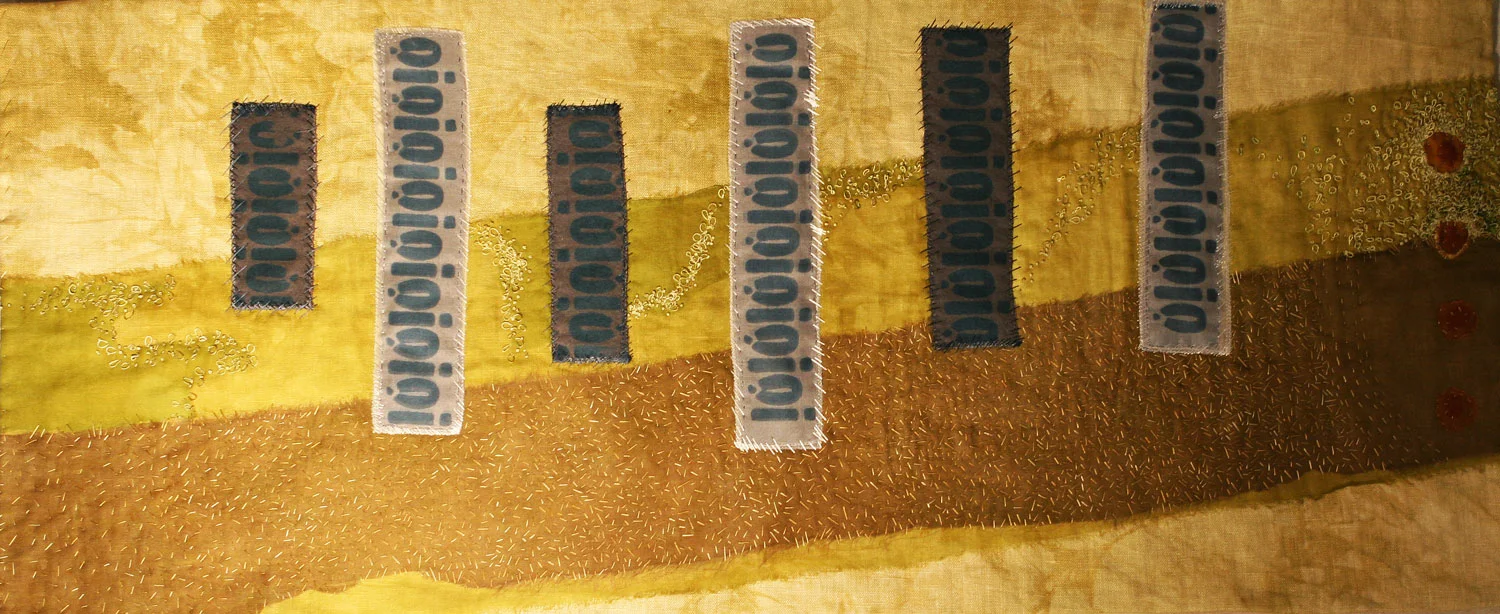
Timeline is my finished project from the Peg Gignoux workshop. Using the techniques she taught in class, I completed this piece which is quite different from my previous projects. My inspiration for this piece came from a photo I took on one of my morning walks on Whidbey Island.
TImeline - 35"x14" July 2014 Hand-dyed silk and linen collage, hand-stitched with hand-dyed silk thread
Timeline is my finished project from the Peg Gignoux workshop. Using the techniques she taught in class, I completed this piece which is quite different from my previous projects. My inspiration for this piece came from a photo I took on one of my morning walks on Whidbey Island.
Inspiration for Timeline
I took both linear elements and color concepts from this photo and incorporated them into my class project (Timeline).
The silk organza, linen, and silk threads were all dyed using Fiber Reactive Procion Type Dyes. The symbols are silk screened using thermofax screens that I borrowed from Peg Gignoux. A base layer of machine stitching anchors the layers. Utilizing the silk thread I dyed, I created a layer of mark making to add texture and depth.
Detail of Timeline
In this piece I was practicing mark making utilizing hash marks, varied loops, as well as french knots. The combination of the silk organza, linen, and felt materials allowed me to play with the impact of varied materials.
For the raw edge applique, I watered down matte medium and applied it to the edges to help prevent further fraying. This worked somewhat but I would apply it multiple times before appliqueing the pieces to the background in the future. Another option would be to use Pellon 805 Wonder Under instead of the Matte Medium.
While there are a number of things I would do differently in retrospect, I am happy with the overall success of the piece. My main objective was to try something outside my comfort zone and this piece was definitely the push that I needed.
Additional detail of Timeline